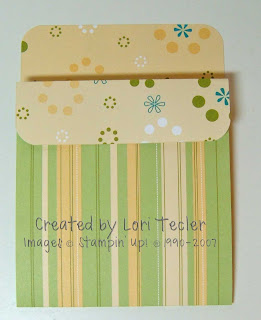
 Today's Ways to Use It Challenge on SCS was to use a pocket in your card design. I had tried this style of pocket card at the Stampin' Up! convention Pajama Party and used this challenge to create my own version.
This version of the pocket card is really easy to make. All you need is some double sided designer paper and some ribbon, a small piece of linen thread (or something similar), plus the coordinating stamps and embellishments that you choose. There's no glue holding the sides together, so you don't need any Sticky Strip or have to worry about cutting the insert card just right to fit inside the pocket. That always seems to be my challenge with a card that has closed sides . . .
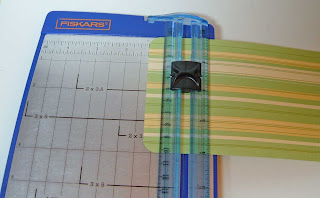
 Start with a piece of 11" by 4" double sided designer (patterned) paper. Here, I used paper from the Petals & Paisleys package. Using a corner rounder, round the four corners.
 Holding the paper horizontally, use a scoring blade (or other scoring tool) to score the paper at 1 1/4" and at 5 1/2". The second score (the 5 1/2" score) will be at the center of the cardstock.
After you've decided which of the patterns on your paper you'd like to be the main pattern for the front of your pocket card, use your scored mark as a guide to fold the cardstock in half at the center fold. Then, fold the small flap down. With patterned paper, this makes a nice contrast.
To make the pocket insert, cut a piece of coordinating cardstock to 5 1/4" by 3 3/4". Use the corner rounder to round the corners. Decorate as desired. Here, I used the Petals Jumbo Wheel in Taken with Teal ink for a monochromatic look on the insert.
Now comes the assembly part. Slide the decorated insert in to the pocket. To keep the pocket closed, cut a length of coordinating ribbon. The ribbon I used was about 11" or so long. Wrap the ribbon around the top of the pocket. The ends should meet on one side of the pocket.
 To secure the pocket, use a piece of linen thread to tie the ends of the ribbon together. I wrapped the thread around the loose ends, then tied a simple, small knot. You need to tie the thread tight to keep the ribbon from loosening. Then, trim the ends of the decorative ribbon if necessary. Now, you're ready to embellish and decorate. I added a layer of scalloped circle punches and a decorated circle with images from Polka Dots & Petals to the pocket card flap. I think this would also be fun with a button or metal edged tag ad an embellishment.
The final step is to use your corner rounder to round the bottom corners (if you'd like). You can see that in my finished sample at the top of this post.
Materials Used:
From Stampin' Up!: Polka Dots & Petals and Fundamental Phrases stamp sets; Petals jumbo wheel and handle; Taken with Teal, Certainly Celery, and So Saffron Classic inks; Taken with Teal, Old Olive, So Saffron, Certainly Celery, and Whisper White cardstock; Petals & Paisleys designer paper; mat pack and paper piercing tool; white gel pen; corner rounder; scalloped circle punch; 1 1/4" and 1 3/4" circle punches
Other: dotted grosgrain (Michaels); Lime Green Stickles (Ranger); brad (Making Memories); linen thread (Walmart)
 Today's Ways to Use It Challenge on SCS was to use a pocket in your card design. I had tried this style of pocket card at the Stampin' Up! convention Pajama Party and used this challenge to create my own version.
  Start with a piece of 11" by 4" double sided designer (patterned) paper. Here, I used paper from the Petals & Paisleys package. Using a corner rounder, round the four corners.
 Holding the paper horizontally, use a scoring blade (or other scoring tool) to score the paper at 1 1/4" and at 5 1/2". The second score (the 5 1/2" score) will be at the center of the cardstock.
 To secure the pocket, use a piece of linen thread to tie the ends of the ribbon together. I wrapped the thread around the loose ends, then tied a simple, small knot. You need to tie the thread tight to keep the ribbon from loosening. Then, trim the ends of the decorative ribbon if necessary. Now, you're ready to embellish and decorate. I added a layer of scalloped circle punches and a decorated circle with images from Polka Dots & Petals to the pocket card flap. I think this would also be fun with a button or metal edged tag ad an embellishment.


Very nice tutorial, Lori! Love the step-by-step instructions with the pictures. Awesome job!
ReplyDeleteWhat a great tutorial!! Love the pocket card! :)
ReplyDeleteLove the paper, Love the pocket!
ReplyDelete