I finished Altenew's Let It Shine course as part of the Altenew Educator Certification Program. I got so many great ideas for adding sparkle and shine to my projects from the course!
This card uses a glitter element for sparkle. I have to admit that I'm not a big glitter fan. That probably comes from being a kindergarten teacher and seeing firsthand the damage that can be done with kids and glitter...To keep the glitter under control, I used a piece of ready-made glittered cardstock on this design. I cut the word "world" from the Big World die set from the blue glitter cardstock and from coordinating turquoise cardstock. After layering the two pieces slightly offset for interest, I set them aside to build my background for the glitter element. I stenciled the Sphere Stencil on a white panel using Minty Mint ink. The globe from the Big World set was stamped and cut out with the matching die, then adhered to the center of the stenciled sphere using foam tape for dimension. I added the die cut word on top. To finish the sentiment I stamped "welcome to the" from the Sentiment Strips 2 set on a narrow turquoise cardstock strip. The strip was added to the left side of the panel, overlapping the stamped globe and just above the first letters of the die cut word. A few silver sequins arranged around the globe added a little more sparkle and shine. The finished panel was adhered to a coordinating light green card base to make a fun and gender-neutral card to welcome a new baby.
Here's a closer look at all of the pretty sparkle! The offset layers are a fun look and help to set the glittered piece off from the background.Materials Used:
Big World stamp and die set, Sentiment Strips 2 stamp set, Dew Drops, Minty Mint, Sweet Leaf, and Tide Blue Crisp Dye inks, Sphere Stencil (Altenew); Gable Green and Tempting Turquoise cardstock (Stampin' Up!); blue glitter cardstock (Recollections); silver sequins; foam tape
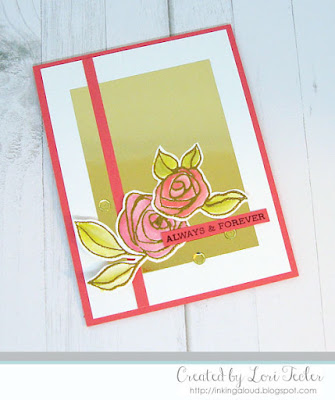
This card pairs gold foil cardstock and a glitter brush pen for lots of shine. I stamped the roses from the Bamboo Rose set in Enchanted Gold pigment ink and heat embossed the images. To color them, I used distress inks and a glitter brush pen. This is the first time I've tried watercoloring with my glitter brush--so pretty and easy, too! Once I finished filling in the flowers, I cut the images out by hand and arranged them on a gold foil rectangle using foam tape for dimension. I centered the foil piece on a white panel and added a long, narrow strip of rosy pink cardstock along the left side of the panel, tucking it beneath the raised roses. The "always and forever" sentiment from the Sentiment Strips stamp set was stamped on another narrow pink cardstock strip. It was placed on the panel overlapping the gold panel and the larger rose. A trio of gold sequins arranged around the flowers and sentiment give the design even more shine. I placed the panel on a matching rosy pink card base to tie all the elements together.
And here's a closeup view of the flower cluster. The gold foil background made it hard to capture the pretty sparkle in the photo, but I promise it's there IRL!.Materials Used:
Bamboo Rose and Sentiment Strips stamp sets, Enchanted Gold Pigment ink (Altenew); clear Sparkle glitter brush pen (Spectrum Noir); Berry Sorbet cardstock (Papertrey Ink); Gold Foil cardstock (Recollections); Zing Gold embossing powder (American Crafts); gold sequins; foam tape


Lovely cards.
ReplyDeleteGorgeous work, Lori!!
ReplyDeleteThank you for submitting your CAS beauties to the AECP assignment gallery.