Thursday, June 30, 2016

Celebrate

I'm up on the SugarPea Designs blog today, sharing a bit of sweet SPD inspiration for you.  My creation was inspired by the current sketch at Retro Sketches and is full of lots of products from last week's SPD release.  Be sure to check it out if you haven't seen all of the goodies yet!

Celebrate card-designed by Lori Tecler/Inking Aloud-stamps and dies from SugarPea Designs
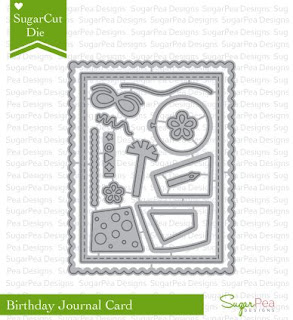
For this card, instead of using the pieces from the SugarCuts Birthday Journal Card die to make a fabulous layered cake, I used them to make a pair of gift boxes!  The boxes were dressed up with the die cut bow also included in the die set.  I arranged them at the bottom of a white panel using foam tape, then stamped the "celebrate" sentiment from the new Celebrate All the Things stamp set above them in pink ink. 

After matting the panel on lime green cardstock and adding a pretty pink twine bow, I adhered it to a stitched rectangle panel with a strip of silver cardstock along the left side.  The panel was set on an angle on a pink card base covered with a piece of festive banner patterned paper from the new It's a Celebration paper pad.

Be sure to check out the creations that some of my other SPD teammates are sharing today on their blogs:

Brianna Loeffelbein
Jenny Peterson

http://www.sugarpeadesigns.com/product/celebrate-all-the-thingshttp://www.sugarpeadesigns.com/product/sugarcut-birthday-journal-card

http://www.sugarpeadesigns.com/product/its-a-celebration-patterned-paper-collection

Materials Used:
Celebrate All the Things stamp set, SugarCuts Birthday Journal Card die, It's a Celebration patterned paper (SugarPea Designs); Memento Rose Bud ink (Tsukineko/IMAGINE Crafts); Raspberry Fizz and Limeade Ice cardstock (Papertrey Ink); silver paper (Target); twine (Divine Twine); foam tape

Wednesday, June 29, 2016

Color Throwdown 399-As Wonderful as the First Sip


It's time for another Color Throwdown!  Vickie is our hostess this week and she's sharing a tasty color combination--chocolate, pale yellow, red, and kraft.  I combined the colors with the current sketch at CAS(e) this Sketch to create a clean and simple coffee themed design.

As Wonderful as the First Sip card-designed by Lori Tecler/Inking Aloud-stamps and dies from Lil' Inker Designs
I used dies from Lil' Inker Designs to create a to go cup for my focal image.  For a pop of red, I added a stitched heart cut with the From the Heart dies to the cup's sleeve.  The finished cup was adhered to a pale yellow card base using foam tape.  I stamped the sentiment from the Coffee Talk stamp set next to the cup in chocolate brown ink.  To finish the design, I added a piece of a kraft colored pearl flourish to the top of the to go cup to look like a bit of steam wafting from the cup.

To play along, just create a paper crafted project using these colors as a starting point and add a direct link to your finished project using the linky tool found at the end of this week's CTD post. As always, if you don’t have exact color matches, something close works just fine. Just be sure that the challenge colors are the dominant ones in your project. And, if you upload your project to an online gallery, use the keyword CTD399. If you upload your projects on social media, go ahead and use the hashtag #ctd399 and #colorthrowdown. You can find us on Instagram (and on Facebook!) with the username colorthrowdown. 

Before you get started, here’s some inspiration from the talented Color Throwdown team, our June guestie, Kara Vrabel, and this week's guest star stamper, Vicki Finger.

** Amy Rohl **  Amy Rysavy ** Barbara ** Broni ** 
 ** Jodi ** Lisa ** Lynn ** Vickie ** Wanda **
** June guestie Kara Vrabel **

Materials Used:
Coffee Talk stamp set, Coffee Cozy and Of the Heart dies (Lil' Inker Designs); Memento Rich Cocoa ink (Tsukineko/IMAGINE Crafts); Barely Banana and Real Red cardstock (Stampin' Up!); Kraft cardstock (Papertrey Ink); marker (Copic); kraft pearl flourish (Want2Scrap); foam tape

Tuesday, June 28, 2016

Happy Anniversary

Here's my card for June's last Viva la Verve sketch challenge.  I used the sketch along with a classic red, gray, and silver color combination to create an anniversary card.

Happy Anniversary card-designed by Lori Tecler/Inking Aloud-stamps from Verve Stamps
I built my design on a pretty gray on gray patterned paper panel.  After adding a trio of narrow shiny silver fishtail flag strips at the top of the panel, I adhered the matted sentiment panel on top.  Verve's "happy anniversary" Plain Jane stamp was stamped on the pale gray pierced rectangle panel in gray pigment ink.  I accented it with a pair of deep red hearts cut with Verve's Heart Quartet die.  Love the pop of the red against the neutral background!  The finished panel was adhered to a gray card base.

Materials Used:
Happy Anniversary Plain Jane stamp, Heart Quartet dies (Verve Stamps); Memento Luxe Gray Flannel ink (Tsukineko/IMAGINE Crafts); Gravel Gray and Grout Gray cardstock, Die-namics Pierced Rectangle STAX and Fishtail Flag STAX dies (My Favorite Things); Cherry Cobbler cardstock (Stampin' Up!); silver paper (Target); foam tape

Monday, June 27, 2016

Mojo Monday 454-I Think You're Quite Cool

I Think You're Quite Cool card-designed by Lori Tecler/Inking Aloud-stamps from Concord & 9th

Happy Monday!  It's time for a new Mojo Monday sketch.  The sketch's large round panel screamed "sun" to me, so I ran with it and made a summery design using stamps from Concord and 9th.

My sun was made with a pinking edged yellow circle topped with a striped yellow patterned paper circle.  I set the round panel at the upper left corner of a light blue dotted patterned paper panel and trimmed the circle so its edges were flush with the panel's edges.  I replaced the sketch's rectangular panel with a popsicle! To get a traditional bomb pop-like look, I inked the top of the solid stamp with red ink and the bottom with blue, leaving the center uninked.  After cutting out the stamped image with the matching die, I stamped the "I think you're quite cool" sentiment on it in black ink.  I wanted to get an icy look, so I brushed over the popsicle with a Spectrum Noir Sparkle pen.  It really does have a sparkly, icy look IRL!  I added the popsicle stick, then used foam tape to adhere the image to the panel over a silver fishtail flag strip.  A few white glitter enamel dot "drips" completed the design.  I adhered the finished panel to a contrasting red card base.

Head on over to the Mojo Monday blog for more inspiration from the design team and to add your own take on this week's sketch!  You can also find all of the Mojo Makers at their blogs here:
Materials Used:
Sweet and Cool stamp set, Sweet and Cool dies (Concord and 9th); Memento Bahama Blue, Love Letter and Tuxedo Black inks (Tsukineko/IMAGINE Crafts); Lemon Tart cardstock, Lemon Tart and Spring Rain patterned paper (Papertrey Ink); silver paper (Target); circle and pinking circle dies (Spellbinders); Die-namics Fishtail Flag STAX dies (My Favorite Things); Clear Overlay Sparkle pen (Spectrum Noir); white glitter enamel dots (Eyelet Outlet); foam tape

Sunday, June 26, 2016

Miss You Pig Time

Here's my card for this week's My Favorite Things Wednesday Sketch Challenge.  I love this week's layout and my card came together quickly with the help of one of the pigs from the new Hog Heaven stamp set. 

Miss You Pig Time card-designed by Lori Tecler/Inking Aloud-stamps and dies from My Favorite Things
I stamped the heart-hugging pig on white cardstock and colored it with Copic markers, then carefully cut it out. The pig was adhered to a pink pierced circle die cut, then layered on to a red mat.  I added the pig to a pink card base over a red gingham patterned paper strip.  The gingham pattern says "farm" to me, so it seemed like a good match for the pig image. 

So that it would stand out against the gingham, the "miss you pig time" sentiment was stamped on a pink fishtail flag strip instead of directly on the panel.  I adhered a very narrow solid red cardstock strip just beneath the patterned panel.  A few white enamel dots scattered around the image panel completed the design.

Materials Used:
Hog Heaven stamp set, Bubblegum cardstock, Die-namics Pierced Circle STAX and Fishtail Flag STAX dies (My Favorite Things); Memento Tuxedo Black ink (Tsukineko/IMAGINE Crafts); markers (Copic); Real Red cardstock (Stampin' Up!); Pure Poppy patterned paper (Papertrey Ink); circle dies (Spellbinders); white enamel dots (Eyelet Outlet); foam tape

Saturday, June 25, 2016

Wishing You a Rainbow of Happiness

Here's my card for this week's sketch at Freshly Made Sketches.  It's a pretty loose interpretation of the sketch, but I think you can see how it inspired me if you look closely!

Rainbow of Happiness card-designed by Lori Tecler/Inking Aloud-stamps and dies from My Favorite Things
Instead of using a pair of round offset panels, I used the stitched rainbow and cloud dies from My Favorite Things.  I arranged the rainbow strips on a blue dotted panel, then added the cloud on top.  The cloud is cut from shimmery white cardstock.  You can't see the shimmer in the photo, but it looks so nice IRL.  The "wishing you a rainbow of happiness" sentiment was stamped on the cloud in black ink.  I slid a narrow shimmery silver cardstock strip beneath the cloud so that it stretched across the width of the card.  The shimmer on the cloud and silver strip make this cheerful design a good fit for the current Simon Says Stamp Add Shimmer challenge.

Materials Used:
Rainbow of Happiness stamp set, Die-namics End of the Rainbow dies (My Favorite Things); Versafine Onyx Black ink (Tsukineko/IMAGINE Crafts); Real Red, Only Orange, Yoyo Yellow, Green Galore, Pacific Point, Lovely Lilac, Bashful Blue, and Shimmery White cardstock (Stampin' Up!); Spring Rain patterned paper (Papertrey Ink); silver cardstock (Michaels); foam tape

Friday, June 24, 2016

SugarPea Designs June Sweet Peek Week-Day 5

Time to Celebrate Gift Set-designed by Lori Tecler/Inking Aloud-stamps and dies from SugarPea Designs

Welcome to day 5 of June's Sweet Peek Week at SugarPea Designs!  Today we're showing off the Sweet Incentive set for this release, Gift Greetings, and the fabulous new SugarCuts Stitched Note and Gift Card Holder dies. They'll be available in the SPD store along with all of the other new goodies tonight (Friday, June 24) at 6 PM EST.

I used some of the stamps and dies we peeked earlier this week (Celebrate All the Things stamp set, SugarCuts Celebrate and Party Banner Duo dies) along with the Gift Greetings set and the SugarCuts Stitched Note and Gift Card Holder dies to make a birthday ensemble.  The ensemble includes a decorated gift bag and coordinating gift card holder.  To dress up the plain white mini paper bag, I covered the front with a piece of paper from the new It's a Celebration paper pad and the back with a coordinating piece of solid cardstock.  I added the die cut word "celebrate" to the patterned paper and stamped the "time to" sentiment from the -- set just above it in navy ink.  It's hard to see in the photo, but I used two die cut words--one blue and one yellow.  I stacked them slightly offset so that the yellow is just barely visible underneath the blue.

I used the same color cardstock for the gift card holder as I used on the back of the gift bag.  I decorated one side of the gift card holder with a banner cut with the SugarCuts Party Banner Duo dies.  The "it's your birthday" sentiment from the Celebrate All the Things set was stamped beneath it in navy ink.  After I tucked a gift card inside the holder, I stamped the "treat yourself to something nice" sentiment from the Gift Greetings set so that the recipient would see the message when it was opened.

Want to win the brand new Gift Greetings stamp set for yourself?  Of course you do!  Leave a comment on today's post on the SPD blog.  You have all week to comment.  Winners from our June product release will be announced on Sunday, June 26.  And, for an extra entry for today's giveaway, leave a comment on each SPD designer's blog, too.  Here's where to find them:

Lori Tecler--you're here!

http://www.sugarpeadesigns.com/product/celebrate-all-the-thingshttp://www.sugarpeadesigns.com/product/gift-greetings

http://www.sugarpeadesigns.com/product/sugarcut-stitched-note-gift-card-holderhttp://www.sugarpeadesigns.com/product/sugarcut-party-banner-duohttp://www.sugarpeadesigns.com/product/sugarcut-celebratehttp://www.sugarpeadesigns.com/product/its-a-celebration-patterned-paper-collection

Materials Used:
Celebrate All the Things and Gift Greetings stamp sets, SugarCuts Celebrate, Party Banner Duo, and Stitched Note and Gift Card Holder dies, It's a Celebration paper pad (Sugar Pea Designs); Memento Nautical Blue ink (Tsukineko/IMAGINE Crafts); Limeade Ice cardstock (Papertrey Ink); Lemon Drop cardstock (My Favorite Things); Night of Navy and Baja Breeze cardstock (Stampin' Up!); mini paper bag

Thursday, June 23, 2016

SugarPea Designs June Sweet Peek Week-Day 4

Make a Wish card-designed by Lori Tecler/Inking Aloud-stamps and dies from SugarPea Designs

Welcome to day 4 of June's Sweet Peek Week at SugarPea Designs!  Today we're showing off the  new Bring on the Cake and HB2U stamp sets and coordinating SugarCuts Birthday Journal Card dies.  They'll be available in the SPD store along with all of the other new goodies on Friday, June 24 at 6 PM EST.

My card features the wonky cake image from the Bring on the Cake set. I stamped the patterned cake images on pink cardstock in pink ink, then used the coordinating die cuts to cut out the stamped pieces.   I used foam tape to adhere the layers to a bright pink stitched rectangle die cut with the new SugarCuts Birthday Journal card die. It's topped with a tiny candle dotted with Gold Stickles on the flame.  Once the cake was in place, I stamped the "make a wish" sentiment beneath it and a pair of streamer strips above it in silver ink, then embossed the images in silver for extra sparkle.  The panel was layered on a pale pink scalloped rectangle, also cut with the new Birthday Journal Card die, and matted with silver paper, then adhered to a pale pink card base using foam tape.

Want to win the brand new Bring on the Cake stamp set for yourself?  Of course you do!  Leave a comment on today's post on the SPD blog.  You have all week to comment.  Winners from our June product release will be announced on Sunday, June 26.  And, for an extra entry for today's giveaway, leave a comment on each SPD designer's blog, too.  Here's where to find them:

Lori Tecler--you're here!

http://www.sugarpeadesigns.com/product/bring-on-the-cake-2http://www.sugarpeadesigns.com/product/hb2u-2

http://www.sugarpeadesigns.com/product/sugarcut-birthday-journal-card

Materials Used:
Bring on the Cake stamp set, SugarCuts Birthday Journal Card die (SugarPea Designs); Delicata Silvery Shimmer and Memento Angel Pink and Cantaloupe inks (Tsukineko/IMAGINE Crafts); Raspberry Fizz and Sweet Blush cardstock (Papertrey Ink); silver paper (Target); silver embossing powder (Hero Arts); Gold Stickles (Ranger); foam tape

Wednesday, June 22, 2016

SugarPea Designs June Sweet Peek Week-Day 3

*** Scroll down to the post below or click HERE to see my card for this week's Color Throwdown challenge! *** 

The Snuggle Is Real card-designed by Lori Tecler/Inking Aloud-stamps and dies from SugarPea Designs

Welcome to day 3 of June's Sweet Peek Week at SugarPea Designs!  Today we're showing off the  new Smitten Kitten stamp set and coordinating SugarCuts Smitten Kitten dies.  They'll be available in the SPD store along with all of the other new goodies on Friday, June 24 at 6 PM EST.

The inspiration for my card came from last week's Mix It Up challenge.  I combined the sketch with the color scheme and dotted pattern from the inspiration photo.  The aqua and red looked great with my gray kitten!  The kitten was colored with Copic markers and cut out with the matching die.  I used a scrap of red dotted patterned paper to cut out the kitten's bed.  I arranged the images (and a cute little cat toy!) on a round panel, then added the circle to an aqua cardstock panel with a strip of red dotted patterned paper along the left edge.  The set's "the snuggle is real" sentiment was stamped on a pierced banner strip from the SugarCuts Gift Tag die set and placed at the bottom of the image panel.


Want to win the brand new Smitten Kitten stamp set for yourself?  Of course you do!  Leave a comment on today's post on the SPD blog.  You have all week to comment.  Winners from our June product release will be announced on Sunday, June 26.  And, for an extra entry for today's giveaway, leave a comment on each SPD designer's blog, too.  Here's where to find them:

Lori Tecler--you're here!

http://www.sugarpeadesigns.com/product/smitten-kitten
 http://www.sugarpeadesigns.com/product/sugarcut-smitten-kitten 
Materials Used:
Smitten Kitten stamp set, SugarCuts Smitten Kitten and Gift Tag dies (SugarPea Designs); Memento Tuxedo Black and Versafine Onyx Black inks (Tsukineko/IMAGINE Crafts); markers (Copic); Aqua Mist cardstock, Pure Poppy patterned paper (Papertrey Ink); Real Red cardstock (Stampin' Up!); foam tape

Color Throwdown 398-I Love Everthing You Dew


It's time for another Color Throwdown!  Lynn is our hostess this week and she's chosen a yummy color combination--raspberry red, hot pink, lime green, and yellow.  I paired the colors with the My Favorite Things Camp Create watercolor challenge for my design.

I Love Everthing You Dew card-designed by Lori Tecler/Inking Aloud-stamps and dies from My Favorite Things
I created a watercolor panel as a background for my card by wetting watercolor paper and washing wide stripes of red, pink, and yellow paints across the panel.  A few green splatters from my paintbrush added a fun pop of contrasting color.  While I waited for the background to dry, I painted a scrap lime green.  I used this scrap to cut the soda bottle for my focal image. 

I stamped the "I love everything you dew" sentiment on one end of a silver strip and adhered that to the watercolored panel, then arranged the die cut bottle and a pair of hearts at the opposite end.  To bring in a bit more green, I added a trio of enamel dots around the bottle, then layered the panel on to a green card base.  It doesn't look too green in the photo, but it really is a lime green color!

To play along, just create a paper crafted project using these colors as a starting point and add a direct link to your finished project using the linky tool found at the end of this week's CTD post. As always, if you don’t have exact color matches, something close works just fine. Just be sure that the challenge colors are the dominant ones in your project. And, if you upload your project to an online gallery, use the keyword CTD398. If you upload your projects on social media, go ahead and use the hashtag #ctd398 and #colorthrowdown. You can find us on Instagram (and on Facebook!) with the username colorthrowdown. 

Before you get started, here’s some inspiration from the talented Color Throwdown team, our June guestie, Kara Vrabel, and this week's guest star stamper, Vicki Finger.

** Amy Rohl **  Amy Rysavy ** Barbara ** Broni ** 
 ** Jodi ** Lisa ** Lynn ** Vickie ** Wanda **
** June guestie Kara Vrabel **
** Guest Star Stamper Vicki Finger  **

Materials Used:
Soda Pop stamp set, Soda Pop Bottles and Staggered Heart Border dies (My Favorite Things); Versafine Onyx Black ink (Tsukineko/IMAGINE Crafts); Limeade Ice, Lemon Tart and Raspberry Fizz cardstock (Papertrey Ink); Real Red cardstock (Stampin' Up!); silver paper (Target); watercolors (Michaels); enamel dots (My Mind's Eye); foam tape

Tuesday, June 21, 2016

SugarPea Designs June Sweet Peek Week-Day 2

Happy Birthday With Sprinkles on Top card-designed by Lori Tecler/Inking Aloud-stamps and dies from SugarPea Designs

Welcome to day 2 of June's Sweet Peek Week at SugarPea Designs!  Today we're showing of the new Summer Scoops stamp set and coordinating SugarCuts dies.  These super sweet stamps and dies are part of SPD's June release that will be available in the SPD store on Friday, June 24 at 6 PM EST.

This set is so much fun!  I featured the ice cream cone on my birthday card.  The stamps are designed to layer to add details, like the criss cross pattern on the cone and the sprinkles on the ice cream.  My sprinkles were stamped in pink ink, then heat embossed with pink embossing powder to give them a textured look and feel.

I found some grid patterned kraft paper that reminded me of the ice cream cone's pattern to use along with the image.  After cutting it on an angle, I edged the bottom with silver and bright pink cardstock strips, then adhered it to a pale pink cardstock panel.  I tucked a bright pink Zig Zag Stitched Circle die cut under the top of the patterned paper panel to frame the cone.  I accented it with a trio of sparkly clear sequins.  The "happy birthday with sprinkles on top" sentiment was heat embossed on the kraft patterned paper in the same pink as I used for the sprinkles.  The panel was matted on kraft cardstock, then adhered to a bright pink card base.

Want to win the brand new Summer Scoops stamp set for yourself?  Of course you do!  Leave a comment on today's post on the SPD blog telling us your favorite ice cream flavor.  You have all week to comment.  Winners from our June product release will be announced on Sunday, June 26.  And, for an extra entry for today's giveaway, leave a comment on each SPD designer's blog, too.  Here's where to find them:

Lori Tecler--you're here!

http://www.sugarpeadesigns.com/product/summer-scoopshttp://www.sugarpeadesigns.com/product/sugarcut-summer-scoops


http://www.sugarpeadesigns.com/product/sugarcuts-zig-zag-stitched-circles

Materials Used:
Summer Scoops stamp set, SugarCuts Summer Scoops and Zig Zag Stitched Circles dies (SugarPea Designs); Memento Toffee Crunch, Rich Cocoa, and Angel Pink inks and Memento Luxe Angel Pink ink (Tsukineko/IMAGINE Crafts); Sweet Blush, Raspberry Fizz, and Kraft cardstock (Papertrey Ink); silver cardstock (Michaels); designer paper (Stampin' Up!); Grapefruit embossing powder (American Crafts); clear sequins (Pretty Pink Posh); foam tape

I Think You're Spectacular

Here's another card for the My Favorite Things Camp Create challenges. This one is for the shaker card challenge.  I made a simple, flat, mail-able shaker from the glasses in the Geek Is Chic Glasses die set.

I Think You're Spectacular card-designed by Lori Tecler/Inking Aloud-stamps and dies from My Favorite ThingsI die cut the frames from black cardstock, then set them into a matching die cut opening in a piece of notebook paper patterned paper.  After backing the open lenses with clear acetate, I added some flat gold star sequins and sealed them securely with a second piece of acetate to create the shaker element. 

The "I think you're spectacular" sentiment from the coordinating Geek Is Chic set was stamped in black ink on a long red fishtail flag die cut strip.  After adhering the sentiment strip to the patterned paper panel, I added a single staple to the end.  It seemed like a good embellishment for my geek-ish themed card.  The finished panel was adhered to a kraft card base.

Materials Used:
Geek Is Chic stamp set, Die-namics Geek Is Chic Glasses and Fishtail Flag STAX dies (My Favorite Things); Versafine Onyx Black ink (Tsukineko/IMAGINE Crafts); Real Red and Basic Black cardstock (Stampin' Up!); Kraft cardstock (Papertrey Ink); Manila Basics 6x6 paper pad (Basic Grey); gold star sequins; acetate; stapler

Monday, June 20, 2016

SugarPea Designs June Sweet Peek Week-Day 1

*** Scroll down to the post below or click HERE to see my card for this week's Mojo Monday Sketch Challenge! *** 

Celebrate Your Special Day card-designed by Lori Tecler/Inking Aloud-stamps and dies from SugarPea Designs

Welcome to day 1 of June's Sweet Peek Week at SugarPea Designs!  Today we're showing off the first of the new stamps, dies, and other goodies that will be available in the SPD store on Friday, June 24 at 6 PM EST.

Our first peek includes a brand new sentiment set, a fun and festive patterned paper pad, and a pair of dies.  I used bits and pieces from all of the new goodies on my card.  One of the papers from the new It's a Celebration paper pad is front and center in my design.  I loved the fun confetti-like pattern, so I didn't want to cover much of it up!  I used the new SugarCuts Celebrate die and a SugarPuff foam sheet to make a dimensional word to place at the bottom of the patterned paper panel.  The "your special day" sentiment from the new Celebrate All the Things stamp set was stamped just beneath the word in gold ink, then heat embossed in gold for a nice pop. I added a coordinating layered banner on top, made with the new Party Banner Duo dies.  The finished panel was adhered to a coordinating pink card base.  With my card's celebration theme and CAS design, it's a perfect fit for the current challenge at The Paper Players.

Want to win the brand new Celebrate All the Things stamp set for yourself?  Of course you do!  Leave a comment on today's post on the SPD blog telling us about a special birthday memory.  You have all week to comment.  Winners from our June product release will be announced on Sunday, June 26.  And, for an extra entry for today's giveaway, leave a comment on each SPD designer's blog, too.  Here's where to find them:

Lori Tecler--you're here!

http://www.sugarpeadesigns.com/.../celebrate-all-the-things
http://www.sugarpeadesigns.com/.../sugarcut-party-banner-duohttp://www.sugarpeadesigns.com/product/sugarcut-celebrate

http://www.sugarpeadesigns.com/product/its-a-celebration-patterned-paper-collection


Materials Used:
Celebrate All the Things stamp set, SugarCuts Celebrate and Party Banner Duo dies, It's a Celebration paper pad, SugarPuff foam sheets (SugarPea Designs); Delicata Golden Glitz ink (Tsukineko/IMAGINE Crafts); Hibiscus Burst cardstock (Papertrey Ink); Sea Glass cardstock (Avery Elle); gold paper (Target); Gold Zing embossing powder (American Crafts)

Mojo Monday 453-Sending Happiness Your Way

Sending Happiness Your Way card-designed by Lori Tecler/Inking Aloud-stamps from Mama Elephant

Happy Monday!  It's time for a new Mojo Monday sketch. I combined the sketch  with some sweet stamps from Mama Elephant.

I used the panda and mailbox images from the Incoming Mail set to make a simple scene.  After coloring the mailbox image with Copic markers, I used the matching dies to cut out the mailbox and panda.  They were adhered to the background panel using foam tape.  I added the teeny, tiny envelope to the panda's hand with an equally teeny, tiny dot of glue.  The panel was matted on navy cardstock, then adhered to a pale gray panel over a pair of diagonal red cardstock strips.  I stamped the "sending happiness your way" sentiment from the coordinating Happy Mail set in contrasting red ink on a pale blue fishtail flag strip, then added that to the bottom of the scene.  The finished panel was adhered to a red card base.

Head on over to the Mojo Monday blog for more inspiration from the design team and to add your own take on this week's sketch!  You can also find all of the Mojo Makers at their blogs here:
Materials Used:
Incoming Mail and Happy Mail stamp sets, Incoming Mail dies (Mama Elephant); Memento Tuxedo Black and Lady Bug inks and Versafine Onyx Black ink (Tsukineko/IMAGINE Crafts); markers (Copic); Cherry, Sea Glass, and Fog cardstock (Avery Elle); Grout Gray cardstock, Die-namics Fishtail Flag STAX dies (My Favorite Things); Night of Navy cardstock (Stampin' Up!); foam tape

Sunday, June 19, 2016

I Love Your True Colors

Here's my card for this week's sketch at Freshly Made Sketches.  It's also an entry for the My Favorite Things Camp Create glitter challenge.  This card has a lot more glitter than I usually use! I'll be finding it around for a while . . .

I Love Your True Colors card-designed by Lori Tecler/Inking Aloud-stamps and dies from My Favorite Things
I used the End of the Rainbow die set to create a rainbow on a pale blue cardstock panel.  The bottom of the rainbow is covered by a shimmery white stitched scallop strip that looks kind of cloud-like.  I used the cloud die from the End of the Rainbow die set to make my super glittery cloud.  Before diecutting the cloud from shimmery white cardstock, I covered it with a ScorTape panel.  To adhere the glitter, I removed the ScorTape backing, then pressed the die cut piece into glitter.  Even after burnishing the glittery piece with a bone folder, there was still some glitter flaking off, so I sprayed the piece with a sealant to minimize the mess before adhering it to the panel with foam tape.  The "I love your true colors" sentiment was stamped beneath the cloud in black ink.  I adhered the finished panel to a dark blue card base.

Materials Used:
Rainbow Greetings stamp set, Die-namics End of the Rainbow and Stitched Scallop Edges dies (My Favorite Things); Memento Tuxedo Black ink (Tsukineko/IMAGINE Crafts); Bashful Blue, Real Red, Only Orange, Yoyo Yellow, Green Galore, Pacific Point, Lovely Lilac, and Shimmery White cardstock, Dazzling Diamonds glitter (Stampin' Up!); foam tape

Saturday, June 18, 2016

Hope Your Day Is As Cool As You Are

Here's my card for this week's My Favorite Things Wednesday Sketch Challenge.  I combined the sketch with one of MFT's Camp Create creative challenges and with this week's Simon Says Stamp Animal Magic challenge theme. I think a slider card featuring a penguin captures both ideas!

I Hope Your Day Is As Cool As You Are card-designed by Lori Tecler/Inking Aloud-stamps and dies from My Favorite Things
I used the sketch to fashion a beach-like scene from kraft cardstock topped with an aqua wave-like strip.  The slider element was cut with one of the Surf and Turf dies, then I added the ready for a swim penguin from the Penguins in Paradise stamp set.  MFT's Spin and Slide discs made it easy to put the slider piece together.  After I adhered the kraft/aqua panel to a light aqua cardstock panel, I added a sun and cloud at the top of the panel to finish the scene.  The "hope your day is as cool as you are" sentiment was stamped on a long orange fishtail flag strip and adhered to a piece of orange striped paper.  I layered the paper on to the kraft panel, adding a fun pop of color and pattern.  The finished panel was adhered to a coordinating aqua card base.

Materials Used:
Penguins in Paradise stamp set, Orange Zest cardstock, Die-namics Penguins in Paradise, Surf and Turf, Fishtail Flag STAX and Flat Bottom Cloud dies, Spin and Slide discs (My Favorite Things); Memento Tuxedo Black ink (Tsukineko/IMAGINE Crafts); markers (Copic); Hawaiian Shores, Aqua Mist, and Kraft cardstock (Papertrey Ink); Shimmery White cardstock (Stampin' Up!); Lush 2 Orange Stripe designer paper (My Mind's Eye); pinking circle dies (Spellbinders); circle punches (EK Success); foam tape

Friday, June 17, 2016

Summer Coffee Lovers Blog Hop

I'm joining in on today's Summer Coffee Lovers Blog Hop with a summer inspired My card is inspired by one of the hottest summer drinks at Starbucks--the "pink drink" from the secret menu!

Stay Cool card-designed by Lori Tecler/Inking Aloud-stamps and dies from My Favorite ThingsMy pink drink is in a die cut to go cup from My Favorite Things. To get its fabulous shade of pink, I inked the die cut with two shades of pink distress inks.  I paired the yummy looking summery drink with the current layout at RetroSketches.  I used foam tape to adhere it to a light blue panel and added foam topping and a pink straw.  The panel was edged with a fun floral print and topped with a pretty rose scalloped strip that I wrapped with pink twine.  I stamped the "stay cool" sentiment on a rose cardstock strip and layered it right over the cup. A few enamel dots accenting the sentiment completed the design.  And though the die cutting is simple, it still qualifies for MFT's Camp Create die cutting challenge!

Materials Used:
Stay Cool stamp set, Die-namics Cool Cup and Stitched Scallop Edges dies (My Favorite Things); Memento Tuxedo Black ink (Tsukineko/IMAGINE Crafts); Spun Sugar and Worn Lipstick distress inks (Ranger); Regal Rose and Pink Pirouette cardstock (Stampin' Up!); Aquamarine and Sea Glass cardstock (Avery Elle); Alphabet Soup Girl "Flower Patch" designer paper (My Mind's Eye); rose enamel dots (Michaels); pink twine (Divine Twine); foam tape

Thursday, June 16, 2016

Hello Friend

I'm up on the SugarPea Designs blog today, sharing a bit of sweet SPD inspiration for you.  My creation was inspired by the current sketch and watercolor theme at Can You Case It.

Hello Friend card-designed by Lori Tecler/Inking Aloud-stamps and dies from SugarPea DesignsI started out by watercoloring a blue sky-like background on a piece of watercolor paper using distress markers and a wet paintbrush.  While the inks dried, I die cut a sun and cloud using the SugarCuts Whatever the Weather dies and the word "hello" from the Chatterbox Journal Card die set.  I also cut "hello" from a SugarPuff foam sheet.  It's a great way to add dimension to a detailed piece like this!

I arranged the die cut pieces on the watercolored panel, then added a few clear sequins from the Sea Spray sequin collection around the sun.  To complete the sentiment, I stamped the word "friend" from the coordinating Chatterbox Sentiments set in aqua ink just beneath the die cut word.  The finished panel was matted on orange cardstock, then adhered to an aqua card base.

I almost forgot--I wanted to add a bit of sparkle to the design, so I went over the watercolored area with a Spectrum Noir glitter pen. So pretty!  My closeup picture doesn't do it justice . . .


Be sure to check out the creations that some of my other SPD teammates are sharing today on their blogs:

Brianna Loeffelbein
Jenny Peterson

http://www.sugarpeadesigns.com/product/chatterbox-sentimentshttp://www.sugarpeadesigns.com/product/sugarcuts-chatterbox-journal-card

http://www.sugarpeadesigns.com/product/sugarcuts-whatever-the-weather

Materials Used:
Chatterbox Sentiments stamp set, SugarCuts Whatever the Weather and Chatterbox Journal Card dies, Sea Spray sequin collection, SugarPuff foam sheets (SugarPea Designs); Aquamarine ink (Avery Elle); Mermaid Lagoon and Peacock Feathers distress markers (Ranger); clear Sparkle Glitter Brush pen (Spectrum Noir); Hawaiian Shores and Orange Zest cardstock (Papertrey Ink); Shimmery White cardstock (Stampin' Up!); foam tape
 
Blogging tips