Tuesday, June 30, 2015
Precious Baby
Here's my card for this month's theme challenge at SugarPea Designs. This month's theme is "feeling sentimental," so I made a sentiment the focus of my card. The layout is based on this week's sketch at RetroSketches.
I'm still working my way through a bunch of old 6x6 paper pads, so when I found this sweet whale patterned paper, I knew it would be perfect for a baby themed design. I matted the paper on blue green cardstock, then on white before adhering it to a blue green card base.
For the sentiment, I die cut the word "baby" several times using a die from the SugarCuts Baby Diaper Pin set. After stacking the die cuts, I adhered them to a light aqua cardstock strip. I stamped the word "precious" from the SugarPea Designs Welcome Baby set above the die cut word using gray ink. I set the sentiment panel in place on top of the patterned paper panel, then added a strip of white ribbon above it, wrapping it around the cardfront. I used my now-neglected Bow Easy to make a double-looped bow, then adhered the bow at the top of the sentiment panel with a glue dot.
Materials Used:
Welcome Baby stamp set, SugarCuts Baby Diaper Pin die (SugarPea Designs); Memento Luxe Gray Flannel ink (IMAGINE Crafts/Tsukineko); Ocean Tides and Aqua Mist cardstock (Papertrey Ink); Bundle of Joy-Boy 6x6 paper pad (Echo Park); white ribbon; Bow Easy
Wonderful Marvelous You
Here's my card for this month's final Viva la Verve sketch. I stretched the square sketch to a standard A2 card size for my version.
I started out by coloring a butterfly from Verve's Blue Skies stamp set. The image was cut with the matching All Aflutter die. I used foam tape to adhere it to a pale gray pierced square die cut stamped with the "wonderful marvelous you" sentiment from the Wonderful Marvelous set.
To make a background for the sentiment, I arranged four yellow circles on a yellow dotted patterned paper panel. I topped the circles with a single, larger red die cut circle, then added the sentiment panel on top. I accented the butterfly with a pretty crystal flight trail, then set the finished panel on a yellow card base.
Materials Used:
Wonderful Marvelous and Blue Skies stamp sets, All Aflutter dies (Verve Stamps); Memento Tuxedo Black ink (IMAGINE Crafts/Tsukineko); Wild Cherry ink, Grout Gray cardstock, Die-namics Pierced Square die (My Favorite Things); markers (Copic); So Saffron and Poppy Parade cardstock (Stampin' Up!); Be(you)tiful 6x6 paper pad (Authentique); circle die (Spellbinders); circle punch (EK Success); crystal flourish (Prima); foam tape
Monday, June 29, 2015
Mojo 404-Best Fishes
Happy Monday! It's time for a new Mojo Monday sketch and since it's the last week of the month, this week's sketch is a long and skinny one. My card measures 3 1/4" x 5 1/2", in case you're wondering.
I inked up Lawn Fawn's Fintastic Friends set for my card, replacing the sketch's round panel with the set's fishbowl image. I filled the bowl with a pair of fish, then colored the image with Copic markers. For a bit of sparkle, I added Stickles to the bubbles between the fish. The bowl was cut out with the matching die.
I placed a piece of orange striped patterned paper on a turquoise cardstock panel, then topped the papers with a strip of light aqua cardstock. The fishbowl was adhered to the top of the light aqua panel using foam tape. I stamped the "best fishes" sentiment at the bottom of the panel in aquamarine ink. The finished panel was adhered to a light aqua card base.
Head on over to the Mojo Monday blog for more inspiration from the design team and to add your own take on this week's sketch!
Materials Used:
Fintastic Friends stamp set, Fintastic Friends dies (Lawn Fawn); Memento Tuxedo Black ink (IMAGINE Crafts/Tsukineko); Aquamarine ink (Avery Elle); markers (Copic); Hawaiian Shores, Aqua Mist, and Orange Zest cardstock (Papertrey Ink); Playful 6x6 paper pad (Authentique); Crystal Stickles (Ranger); foam tape
I inked up Lawn Fawn's Fintastic Friends set for my card, replacing the sketch's round panel with the set's fishbowl image. I filled the bowl with a pair of fish, then colored the image with Copic markers. For a bit of sparkle, I added Stickles to the bubbles between the fish. The bowl was cut out with the matching die.I placed a piece of orange striped patterned paper on a turquoise cardstock panel, then topped the papers with a strip of light aqua cardstock. The fishbowl was adhered to the top of the light aqua panel using foam tape. I stamped the "best fishes" sentiment at the bottom of the panel in aquamarine ink. The finished panel was adhered to a light aqua card base.
Head on over to the Mojo Monday blog for more inspiration from the design team and to add your own take on this week's sketch!
Materials Used:
Fintastic Friends stamp set, Fintastic Friends dies (Lawn Fawn); Memento Tuxedo Black ink (IMAGINE Crafts/Tsukineko); Aquamarine ink (Avery Elle); markers (Copic); Hawaiian Shores, Aqua Mist, and Orange Zest cardstock (Papertrey Ink); Playful 6x6 paper pad (Authentique); Crystal Stickles (Ranger); foam tape
Sunday, June 28, 2015
Sweet Sunday Sketch Challenge 275-Make a Wish
It's time for another Sweet Sunday Sketch Challenge! I replaced the trio of circles in the sketch with a trio of yummy cupcakes for my take on the layout.
I used the cupcake image from Avery Elle's Bring on the Cake set. The cupcakes were stamped on white cardstock and colored with Copic markers, then cut with the matching die. Originally I left the plates white, but in the end, decided to paper piece them with pale pink cardstock.
I used foam tape to adhere the trio of cupcakes across a rose panel. After matting the rose panel on dark brown cardstock, I adhered it to the top of a pale pink card base. I tucked a kraft fishtail flag underneath the left edge of the panel, then stamped the "make a wish" sentiment at the bottom of the cardfront in brown pigment ink.
To play along, just create a card based on the sketch and link it up on the SSSC blog. Be sure to stop by the blog to check out what the SSSC team has created using the sketch. And, don't forget to check in on Wednesday to see one of our favorite cards made with the sketch.
Materials Used:
Bring on the Cake stamp set, Bring on the Cake dies (Avery Elle); Memento Tuxedo Black and Memento Luxe Rich Cocoa inks (IMAGINE Crafts/Tsukineko); markers (Copic); Pink Pirouette, Regal Rose, Close to Cocoa, and Crumb Cake cardstock (Stampin' Up!); Fishtail Flag Stax die (My Favorite Things); foam tape
Saturday, June 27, 2015
You're So Sweet
Here's my card for this week's sketch at Freshly Made Sketches. I've been looking for the opportunity to put together a card using this sweet sentiment from the Waltzingmouse Stamps We Go Together set and it worked perfectly on this sketch!
I started out by stamping the to go cup an donut images on white cardstock, then colored the images with Copic markers and cut them out with the matching dies. The sprinkles on the donut were added with white pigment ink. I used foam tape to adhere the pair to a kraft card base over a wide pink cardstock panel. The super sweet sentiment was stamped at the bottom of the pink panel in rose pigment ink.
Materials Used:
We Go Together stamp set, We Go Together dies (Waltzingmouse Stamps); Memento Tuxedo Black and Memento Luxe Wedding Dress and Rose Bud inks (IMAGINE Crafts/Tsukineko); markers (Copic); Regal Rose and Pink Pirouette cardstock (Stampin' Up!); Kraft cardstock (WPlus9); foam tape
I started out by stamping the to go cup an donut images on white cardstock, then colored the images with Copic markers and cut them out with the matching dies. The sprinkles on the donut were added with white pigment ink. I used foam tape to adhere the pair to a kraft card base over a wide pink cardstock panel. The super sweet sentiment was stamped at the bottom of the pink panel in rose pigment ink.Materials Used:
We Go Together stamp set, We Go Together dies (Waltzingmouse Stamps); Memento Tuxedo Black and Memento Luxe Wedding Dress and Rose Bud inks (IMAGINE Crafts/Tsukineko); markers (Copic); Regal Rose and Pink Pirouette cardstock (Stampin' Up!); Kraft cardstock (WPlus9); foam tape
You're Handy to Have Around
This week's My Favorite Things Wednesday Sketch Challenge had me stumped for a bit! I finally came up with this loose interpretation of the design with a masculine theme.
I made the large panel into a piece of pegboard, courtesy of a cut file and my Silhouette. After (troubleshooting my Silhouette and) cutting the pegboard panel from kraft cardstock, I backed it with gray cardstock to emphasize the holes. Then I worked on die cutting the tools with MFT's Tool Time dies. Once they were assembled, I arranged them on the pegboard panel. There were only 4 tools, so I didn't get 5 elements like there were in the sketch, but I think it's still close enough!
I tried several colors of solid cardstock strips for the sentiment, but they covered more of the tools than I liked, so I ended up going with vellum instead. The "you're handy to have around" sentiment was stamped in red ink on the vellum strip and layered over the tools. After placing the vellum, I carefully (so the still wet ink wouldn't smudge!) set the red frame around the edges of the pegboard panel.
Materials Used:
Let's Tool Around stamp set, Steel Grey cardstock, Wild Cherry ink, Die-namics Tool Time dies (My Favorite Things); Poppy Parade and Crumb Cake cardstock (Stampin' Up!); kraft cardstock (Canvas Corp.); silver paper (Target); white vellum (The Paper Company); pegboard cut file
Friday, June 26, 2015
Have a Super Day
Here's my card for the current SugarPea Designs Creative Color Challenge. Although the inspiration photo featured sweet, summery bowls of berries, I went in a different direction with the colors and used SPD's My Hero set for my card. If you follow me on Instagram, you might have seen this little guy a few days ago.
I colored the superhero image with Copic markers, then carefully cut him out and adhered him to a yellow circle using foam tape. The circle was adhered to a blue cardstock panel over a piece of navy dotted patterned paper. I stamped the "have a super day" sentiment on red ink and added it to the panel, tucking one end beneath the raised image. For a bit of sparkle, I added a silver fishtail flag strip underneath the round panel and a whole bunch of blue glittery enamel dots. The finished panel was adhered to a dark blue card base.
Materials Used:
My Hero stamp set (SugarPea Designs); Memento Tuxedo Black ink (IMAGINE Crafts/Tsukineko); markers (Copic); Real Red, Marina Mist, and So Saffron cardstock (Stampin' Up!); Enchanted Evening cardstock (Papertrey Ink); Salt Staples 2-Navy Salt designer paper (Jillibean Soup); silver paper (Target); double ended banner die (Papertrey Ink); circle die (Spellbinders); blue glitter enamel dots (Eyelet Outlet); foam tape
Thursday, June 25, 2015
MFT Summer School
I took a little time yesterday to play along with some of the Summer School lessons featured on the My Favorite Things blog. I tried out two of the design lessons when creating these two cards.
Here's my card to demonstrate the use of line. My machine stitched lines on the card's blue panel help draw the eye from the cluster of die cut images at the top of the card to the sentiment at the bottom. The die cut images include pair of flat bottomed clouds cut from shimmery white cardstock and a cheery gingham sun tucked beneath the clouds. I studded the stitched lines with sparkly silver sequin "raindrops," randomly placed along the lines. The encouraging sentiment was stamped at the bottom of the panel in gray pigment ink. I layered the finished panel on a soft gray card base.
And, this card demonstrates use of white space. I used MFT's light bulb die to make a layered light bulb for my focal point. I cut the bulb from both white cardstock and white vellum. Layering the vellum on top gives the bulb a frosted look. The shiny silver cardstock I used for the filament and the socket mirror the metallic look those pieces would have in a traditional bulb. To set the white bulb off from the background, I did a yellow freeform watercolor wash on a piece of watercolor paper, mimicking the soft glow of a lit bulb. I adhered the bulb to the panel with foam tape over several messy loops of silver thread. I stamped the "say watt?" sentiment from the Watt's Up? set next to the bulb, then arranged a trio of sequins around the bulb for a little sparkle. The finished panel was layered on a pale yellow card base.
Materials Used:
Grout Gray, Lemon Drop, and Summer Splash cardstock (My Favorite Things); Memento Luxe Gray Flannel ink (IMAGINE Crafts/Tsukineko); Shimmery White cardstock (Stampin' Up!); Lemon Tart patterned paper (Papertrey Ink); pinking circle die (Spellbinders); circle die (EK Success); silver sequins (Michaels); sewing machine; foam tape
Watt's Up stamp set, Lemon Chiffon cardstock, Die-namics Lightbulb die (My Favorite Things); Memento Luxe Tuxedo Black ink (IMAGINE Crafts/Tsukineko); silver paper (Target); white vellum (The Paper Company); watercolor paper (Ranger); watercolors, silver sequins, silver thread (Michaels); foam tape
Keep Calm and Eat Chocolate
Here's my card for the current Viva la Verve sketch. I went sweet on this one, using Verve's Chocolate stamp set and coordinating Chocolate Word die on the sketch's large panel.
I stamped the "keep calm and eat" sentiment in brown pigment ink on a kraft panel, then added the die cut word "chocolate" at the bottom of the panel. For dimension, I cut the word several times, then layered the die cut words. I stamped a pair of tiny chocolates above the word to fill in the panel a bit, then inked the edges with some brown distress ink for a richer look.
After matting the panel on dark brown cardstock, I adhered it to a pink dotted panel on an angle. I anchored the panel with strips of gold dotted washi tape along the top and bottom. To bring in a bit more gold, I arranged a few different sized gold sequins around the sentiment. The finished panel was matted on brown cardstock, then adhered to a pale pink card base.
Materials Used:
Chocolate stamp set, Chocolate Word die (Verve Stamps); Memento Luxe Rich Cocoa ink (IMAGINE Crafts/Tsukineko); Tea Dye distress ink (Ranger); Chocolate Chip cardstock (Stampin' Up!); Sweet Blush cardstock (Papertrey Ink); Kraft cardstock (WPlus9); Chalk Studio 6x6 paper pad (My Mind's Eye); Pierced Rectangle Stax die (My Favorite Things); gold dotted washi tape; gold sequins
Wednesday, June 24, 2015
Color Throwdown 348-Super Duper
It's time for another 
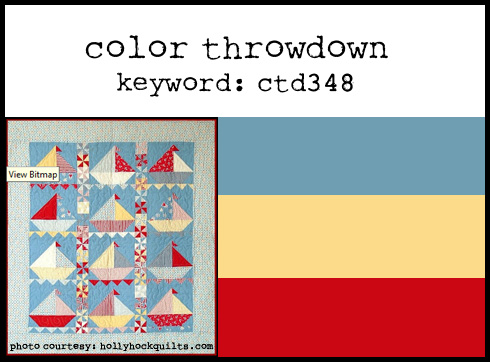
Color Throwdown! Joan is our hostess this week and she's chosen a primary color scheme inspired by this nautical quilt--blue, yellow, and red.
Since I did a nautical card for last week's CTD, I went in a different direction and did a superhero themed card. My superhero is from Mama Elephant's Tiny Heroes set. I colored the hero with Copic markers, then cut out the image with the matching die. I used foam tape to adhere the hero to a blue card base over a "cloud" cut with one of ME's Landscape Trio dies. The hero was backed with a twisted messy bundle of silver thread. To bring in more silver, I stamped the sentiment in silver ink, then heat embossed it with silver embossing powder. I accented the words with a trio of super sparkly silver sequins.
To play along, just create a paper crafted project using these colors as a starting point and add a direct link to your finished project using the linky tool found at the end of this week's CTD post. As always, if you don’t have exact color matches, something close works just fine. Just be sure that the challenge colors are the dominant ones in your project. And, if you upload your project to an online gallery, use the keyword CTD348. If you upload your projects on social media, go ahead and use the hashtag #ctd348 and #colorthrowdown. You can find us on Instagram (and on Facebook!) with the username colorthrowdown. Before you get started, here’s some inspiration from the talented Color Throwdown team, our June guestie, Nancy Thomas, and this week’s guest star stamper, Karren.
** June guestie Nancy Thomas **
** Guest Star Stamper Karren J **
Materials Used:
Tiny Heroes stamp set, Tiny Heroes and Landscape Trio dies (Mama Elephant); Memento Tuxedo Black and Delicata Silvery Shimmer inks (IMAGINE Crafts/Tsukineko); markers (Copic); Brocade Blue and Shimmery White cardstock (Stampin' Up!); silver thread (Michaels); silver embossing powder (American Crafts); silver sequins; foam tape
Tuesday, June 23, 2015
TCP Tuesday 293-No Road Is Too Long
It's time for a new TCP Tuesday challenge at The Cat's Pajamas! Christine is our hostess this week and she's shared a fabulous summery photo collage for us to be inspired by. I took my inspiration from the bicycle in one of the photos and used the Besties set and the CutUps Slider die to make an interactive card.
I colored the bike riding penguin pair with Copic markers, then set the finished image in a simple scene. I made the road from gray cardstock, then cut a slit in it using the slider die. After adding a strip of die cut grass on top of the "road," I used foam tape to adhere it to a piece of aqua dotted paper. I attached the slider tabs to the back of the bike image, then set it in the slider track. Too fun! I filled in the rest of the scene with some clouds cut with the Stitched Clouds dies and a little scalloped circle sun. One of the set's sentiments was stamped in black ink on a contrasting red cardstock strip and adhered to the left side of the card.
Be sure to stop by the TCP blog for more inspiration and for all the details on how you can play along with the challenge. Challenge participants have a chance to win a Cat Cash prize (with a little extra thrown in if you use TCP stamps/dies) and to be named the Swanky Stamper of the month, which earns you a slot in an upcoming TCP release blog hop along with a selection of stamps from the release! Be sure to link up your card on the TCP blog for a chance to win.
Materials Used:
Besties stamp set, CutUps Grass, Slider and Stitched Clouds dies (The Cat's Pajamas); Versafine Onyx Black ink (IMAGINE Crafts/Tsukineko); markers (Copic); Aqua Mist, Simply Chartreuse, Lemon Tart, and Smokey Shadow cardstock, Aqua Mist patterned paper (Papertrey Ink); Real Red and Shimmery White cardstock (Stampin' Up!); scalloped circle die (Martha Stewart); foam tape
Monday, June 22, 2015
The Challenge 40-You're a Lifesaver
*** Scroll down to the post below or click HERE to see my card for this week's Mojo Monday sketch! ***
The Challenge is back again with a new challenge! This week we've got a theme challenge for you. Our nautical theme is perfect for summer card designs!
I combined the challenge's nautical theme with the current sketch at Freshly Made Sketches to make this whimsical thank you card. The big eared bunny image is from The Cat's Pajamas. I colored him up with Copic markers, then carefully cut him out. He's tucked in between the dotted aqua sky background and a wavy stitched border die cut that's serving as water. To fill out the scene, I added a pair of stitched clouds and a cheery yellow scalloped circle sun. The "you're a lifesaver" sentiment was stamped just beneath the clouds. I edged the scene with red cardstock, then adhered it to a white card base.
Don't miss what the rest of The Challenge team and our talented guest designers have created for this week's inspiration challenge. Here's where to find them:
Nance Salkeld
Karolyn Loncon, June featured designer
Hayley Kew, guest designer
After this week's challenge, The Challenge will be taking a summer break. Hope you'll join us again when we return in September!
Materials Used:Karolyn Loncon, June featured designer
Hayley Kew, guest designer
After this week's challenge, The Challenge will be taking a summer break. Hope you'll join us again when we return in September!
Aye, Aye Captain stamp set, CutUps Stitched Cloud and Wavy Stitched Border dies (The Cat's Pajamas); Memento Tuxedo Black ink (IMAGINE Crafts/Tsukineko); markers (Copic); Pure Poppy, Lemon Tart, and Hawaiian Shores cardstock, Aqua Mist patterned paper (Papertrey Ink); scalloped circle punch (Martha Stewart); foam tape
Mojo Monday 403-Thank You So Much
Happy Monday! It's time for a new Mojo Monday sketch. I used the sketch and one of the fun ragdoll stamps from Clear and Simple Stamps to make a cheery thank you card.
I used Rag Doll: Willa as my focal image. She was colored with Copic markers, then die cut with a round die. I layered the colored image over red and yellow cardstock panels to match the colors of the image, then adhered all of the panels to a piece of striped patterned paper. I tucked a long gray fishtail flag strip, cut with one of CSS's Favor Flags dies, under the image panel to bring in the gray from the patterned paper and from the cardstock mats. The finished panel was adhered to a golden yellow card base.
Head on over to the Mojo Monday blog for more inspiration from the design team and to add your own take on this week's sketch!
Materials Used:
Rag Doll Willa: Thanks stamp set, Golden Tiara, Rouge Ruffles, I Steel Got It, and A Blanc Check cardstock, Favor Flags die (Clear and Simple Stamps); Memento Tuxedo Black ink (IMAGINE Crafts/Tsukineko); markers (Copic); Be(you)tiful 6x6 paper pad (Authentique); circle die (Spellbinders)
Sunday, June 21, 2015
Paper Smooches SPARKS-Botanical Thanks
*** Scroll down to the post below or click HERE to see my card for this week's Sweet Sunday Sketch Challenge! ***
This week's Paper Smooches SPARKS challenge is an anything goes challenge. I used the new Botanicals 3 stamp set for this simple floral thank you card.
I did my stamping on a pale mossy green cardstock panel. When I stamp on colored cardstock, I usually use pigment inks to get a nice, solid look, so that's what I did here. To switch things up a bit, I used a neon yellow ink to get the flowers extra bright.Once I'd finished stamping the leaves and flowers, I stamped the script "thanks" from the Simply Said set between the branches. To add a bit of dimension, I put a green enamel dot at the center of each flower. After matting the panel on yellow cardstock, I adhered it to an easy to write on white card base.
Don’t miss what the rest of the SPARKS team has created this week based on the photo. Here’s where to find them:
Lori Tecler--you're here!
Materials Used:
Botanicals 3 and Simply Said stamp sets (Paper Smooches); Memento Luxe Pear Tart and Radiant Neon Electric Yellow inks (IMAGINE Crafts/Tsukineko); Spring Moss and Lemon Tart cardstock (Papertrey Ink); green enamel dots (Eyelet Outlet)
Sweet Sunday Sketch Challenge 274-To the Stars and Back
It's time for another Sweet Sunday Sketch Challenge! For my version of the sketch, I switched out the sketch's star shapes for a sweet image from Mama Elephant and a few sparkly enamel dots.
I stamped the bear pair from the Bear Hugs set and colored them with Copic markers, then used the matching die to cut out the colored image. I used foam tape to adhere the bears to a light blue card base with an angled navy cardstock panel at the top. A strip of green along the bottom edge of the navy panel added a little contrast to the shades of blue. I paired the image with a sentiment from another Mama Elephant set, Shooting Star. With the help of my MISTI, I stamped the words nice and straight along the bottom of the cardfront in navy ink. To go with the image and sentiment, I added a few glittery gold enamel dot "stars" around the bears.To play along, just create a card based on the sketch and link it up on the SSSC blog. Be sure to stop by the blog to check out what the SSSC team has created using the sketch. And, don't forget to check in on Wednesday to see one of our favorite cards made with the sketch.
Materials Used:
Bear Hugs and Shooting Star stamp sets, Bear Hugs dies (Mama Elephant); Memento Tuxedo Black and Nautical Blue inks (IMAGINE Crafts/Tsukineko); markers (Copic); Bashful Blue, Night of Navy, and Old Olive cardstock (Stampin' Up!); gold enamel dots (Eyelet Outlet); foam tape
Saturday, June 20, 2015
Your Future Is Bright
Here's my card for this week's My Favorite Things Wednesday Sketch Challenge. This super bright design would make a perfect graduation card, wouldn't it?
I paired the eyeglasses from the Die-namics Geek Is Chic Glasses set with a sentiment from the Watt's Up stamp set. The large eyeglasses were die cut from black cardstock. I filled in the lenses with silver paper to make reflective-looking lenses, then used foam tape to adhere them to a yellow stitched circle die cut.
I made a frame from a piece of black cardstock cut with a stitched rectangle die, then filled in the frame with yellow patterned paper. After layering the framed patterned paper on a yellow cardstock panel, I added the glasses on top. The sentiment was stamped in shiny silver ink on a white fishtail flag strip. I tucked the straight end of the strip underneath the round panel and let just a teeny, tiny bit of the pointed ends extend beyond the white card base.
Materials Used:
Watt's Up stamp set, Lemon Drop cardstock, Die-namics Geek Is Chic Glasses, Fishtail Flag Stax, and Blueprints 24 dies (My Favorite Things); Delicata Shimmery Silver ink (IMAGINE Crafts/Tsukineko); Basic Black cardstock (Stampin' Up!); silver paper (Target); Sunkissed 6x6 paper pad (Doodlebug Design); stitched rectangle die (Lil' Inker Designs); foam tape
No Lion
Here's my card for June's Reverse Confetti Sketch for You to Try. I've had the Leaping Lions set in my stash for a while, but hadn't inked it up yet, so I decided to try it out for this month's sketch.
I colored the lion using Copic markers, then used the matching die to cut out the colored image. I used foam tape to adhere the lion to a golden yellow panel. I stamped the "no lion" sentiment next to the lion in green pigment ink.
The panel was adhered to a piece of green patterned paper on a kraft card base. I threaded a darker green cardstock strip beneath the lion, stretching across the cardfront. The card looked a bit bare, so I decided to add the pennant image from the set across the top of the yellow panel. The yellow flags were colored with a marker, then stamped with the striped image. The green ones were stamped in the same green pigment ink I used for the sentiment. I finished the design with a bunch of sparkly gold enamel dots clustered around the sentiment.
Materials Used:
Leaping Lions stamp set, Confetti Cuts Leaping Lions dies (Reverse Confetti); Memento Tuxedo Black ink (IMAGINE Crafts/Tsukineko); Lemon Grass ink (Avery Elle); markers (Copic); Harvest Gold and Simply Chartreuse cardstock (Papertrey Ink); Kraft cardstock (WPlus9); On Holiday designer paper (Girls' Paperie); foam tape
Friday, June 19, 2015
Baby in Blue
Here's my card for this month's sketch challenge at SugarPea Designs. My interpretation of the sketch is kind of loose, but I think you can still see the basic sketch if you look closely . . .
I colored the stork and baby from the Bundle of Joy set using Copic markers. After rounding the panel's corners, I matted it on light blue cardstock, then layered it on to a piece of blue patterned paper.
Instead of adding a round panel over the lower right corner of the image panel, I used a die cut word. I die cut the word "baby" from the SugarCuts-Baby Diaper Pin die set several times from blue cardstock, then stacked the die cuts for dimension. To get a shadow-like look, I die cut the word one more time, this time from dark gray cardstock. I adhered the gray die cut at the bottom of the layered die cut stack, slightly offset to create a faux shadow. I accented the word with a small die cut pink heart. The finished panel was adhered to a blue card base.
Materials Used:
Bundle of Joy stamp set, SugarCuts-Baby Diaper Pin die (SugarPea Designs); Memento Tuxedo Black ink (IMAGINE Crafts/Tsukineko); markers (Copic); Baja Breeze cardstock (Stampin' Up!); Smokey Shadow cardstock (Papertrey Ink); Sea Glass cardstock (Avery Elle); Hello Summer 6x6 paper pad (Echo Park); stitched heart die (Lil' Inker Designs); corner rounder; foam tape
Thursday, June 18, 2015
You Are My Hero
Here's my card for the current sketch at Retro Sketches. I used one of the cute superheroes from the Mama Elephant Tiny Heroes set and a bold primary color scheme to put this one together.
I colored the girl superhero image using Copic markers, then cut out the colored image with the matching die. I used foam tape to adhere her to a round panel. The "you are my hero" sentiment from the In My Heart stamp set was stamped on a yellow fishtail flag strip and attached to the bottom of the panel, tucked just beneath the hero's feet.
After matting the image panel on sparkly silver paper, I arranged the image and other panels on a blue card base. The image was accented with a bunch of sparkly silver sequins.
Materials Used:
Tiny Heroes and In My Heart stamp sets, Tiny Heroes dies (Mama Elephant); Memento Tuxedo Black ink (IMAGINE Crafts/Tsukineko); markers (Copic); Brocade Blue, Real Red, Crushed Curry, and Night of Navy cardstock (Stampin' Up!); silver paper (Target); Die-namics Fishtail Flag Stax dies (My Favorite Things); circle dies (Spellbinders); foam tape
I colored the girl superhero image using Copic markers, then cut out the colored image with the matching die. I used foam tape to adhere her to a round panel. The "you are my hero" sentiment from the In My Heart stamp set was stamped on a yellow fishtail flag strip and attached to the bottom of the panel, tucked just beneath the hero's feet.After matting the image panel on sparkly silver paper, I arranged the image and other panels on a blue card base. The image was accented with a bunch of sparkly silver sequins.
Materials Used:
Tiny Heroes and In My Heart stamp sets, Tiny Heroes dies (Mama Elephant); Memento Tuxedo Black ink (IMAGINE Crafts/Tsukineko); markers (Copic); Brocade Blue, Real Red, Crushed Curry, and Night of Navy cardstock (Stampin' Up!); silver paper (Target); Die-namics Fishtail Flag Stax dies (My Favorite Things); circle dies (Spellbinders); foam tape
Wednesday, June 17, 2015
Color Throwdown 347-You're a Lifesaver
It's time for another Color Throwdown! Broni is our hostess this week and she's shared a fabulous color scheme--turquoise, hot pink, gray, and white.
I went nautical (and a little more red than pink!) for my take on the colors. I used the Wicked Nauticool stamp set and matching Nauticool dies to make a boat that I set on a turquoise background. For the sky, I used a piece of star patterned paper. The wave-filled water was made from a piece of cardstock cut with a scalloped border die from the Borders 2 die set. I finished the scene with a pair of tiny shimmery white clouds cut with the Clouds dies.
I matted the scene on contrasting red cardstock, then adhered it to a gray panel over a strip of red cardstock and a turquoise half circle. The "you're a life saver" sentiment was stamped just beneath the gray strip in turquoise ink. I adhered the finished panel to a turquoise card base.
To play along, just create a paper crafted project using these colors as a starting point and add a direct link to your finished project using the linky tool found at the end of this week's CTD post. As always, if you don’t have exact color matches, something close works just fine. Just be sure that the challenge colors are the dominant ones in your project. And, if you upload your project to an online gallery, use the keyword CTD347. If you upload your projects on social media, go ahead and use the hashtag #ctd347 and #colorthrowdown. You can find us on Instagram (and on Facebook!) with the username colorthrowdown.
Before you get started, here’s some inspiration from the talented Color Throwdown team, our June guestie, Nancy Thomas, and this week’s guest star stamper, Janet Ribet.
** June guestie Nancy Thomas **
** Guest Star Stamper Janet Ribet **
Materials Used:
Wicked Nauticool stamp set, Nauticool, Borders 2, and Clouds dies (Paper Smooches); Memento Tuxedo Black and Memento Luxe Teal Zeal inks (IMAGINE Crafts/Tsukineko); markers (Copic); Real Red, Taken with Teal, and Shimmery White cardstock (Stampin' Up!); Steel Grey cardstock (My Favorite Things); Beachside 6x6 paper pad (Paper Smooches); circle punch (EK Success); foam tape
Tuesday, June 16, 2015
Birthday Blocks
I'm joining the Monthly Meetup at Lil' Inker Designs with this fun birthday card based on the current sketch at CAS(e) this Sketch. Lil Inker's party hat dies helped me put this festive design together in no time at all.
I die cut the hats from two shades of blue cardstock, then assembled them and added a shiny silver topper to each hat. The hats were adhered over four contrasting red cardstock squares arranged on a white cardstock panel. To add to the festive feel, I made a messy thread pile behind the hats using some silver thread. The "happy birthday" sentiment from the Balloon Builders set was stamped just beneath the squares in black ink. I adhered the finished panel to a coordinating aqua card base.
Materials Used:
Balloon Builders stamp set, Party Hats dies (Lil' Inker Designs); Memento Tuxedo Black ink (IMAGINE Crafts/Tsukineko); Real Red cardstock (Stampin' Up!); Sea Glass cardstock (Avery Elle); Hawaiian Shores cardstock (Papertrey Ink); silver paper (Target); square punch (EK Success); silver thread (Michaels); foam tape
More Than Chocolate
Here's my card for the current Viva la Verve sketch challenge. I used Verve's Chocolate set and coordinating die for a super sweet love themed design.
I arranged the pair of tilted panels--one solid brown and one pink patterned--on a kraft card base. The patterned panel was topped with half of a paper doily. I wrapped the cardfront with a piece of brown grosgrain ribbon from my scrap pile and secured with a bow. I topped the layered panels with the sentiment panel. I stamped the "I love you more than" in brown ink on the white panel, then added the die cut "chocolate" beneath it. For dimension, I die cut the word three times, then stacked the die cuts before adhering them to the panel. I finished the card with a light pink heart, cut with Verve's Heart Quartet dies.
Materials Used:
Chocolate stamp set, Chocolate Word and Heart Quartet dies (Verve Stamps); Memento Rich Cocoa ink (IMAGINE Crafts/Tsukineko); Chocolate Chip and Pink Pirouette cardstock, Chocolate Chip grosgrain ribbon (Stampin' Up!); Kraft cardstock (WPlus9); Cut and Paste "Adorbs" 6x6 paper pad (My Mind's Eye); white paper doily; corner rounder; foam tape
Monday, June 15, 2015
The Challenge 39-My Cup of Tea
*** Scroll down to the post below or click HERE to see my card for this week's Mojo Monday sketch! ***
The Challenge is back again with a new challenge! This week we've got an inspiration challenge for you. I was inspired by the photo's tea party theme and the soft, pretty colors.
The layout for my card comes from the current Deconstructed Sketch. I colored the teacup image from the Reverse Confetti Be a Barista stamp set using Copic markers, then filled in the "tea" with kraft colored pigment ink. After cutting out the colored image, I used foam tape to adhere it to a white die cut tag. The "you're just my cup of tea" sentiment was stamped just above the cup in kraft ink. A fishtail flag strip, anchored with a rose colored heart, was adhered just beneath the teacup. I topped the tag with a pink bow tied with my Bow Easy. It's been a while since I used it and I'm glad I remembered how it works!I attached the finished tag to a blue cardstock panel that I'd topped with a strip of girly pink patterned paper. The finished panel was adhered to a pale pink card base.
Don't miss what the rest of The Challenge team and our talented guest designers have created for this week's inspiration challenge. Here's where to find them:
Materials Used:
Be a Barista stamp set, Confetti Cuts Love Notes and Tag Me dies (Reverse Confetti); Memento Tuxedo Black ink, Memento Luxe Toffee Crunch ink (IMAGINE Crafts/Tsukineko); markers (Copic); Pixie and Sea Glass cardstock (Avery Elle); Regal Rose cardstock (Stampin' Up!); Garden Party 6x6 paper pad (Pebbles); Traditional Tag Stax die (My Favorite Things); pink organza ribbon; Bow Easy; foam tape
Mojo Monday 402-Teachers Count
Today's a big day for me. I'm making my debut as part of the Mojo Monday design team and it's the last day of the school year! This was my first year back in the classroom after an over 10 year stint in a non-classroom position in the central office, so it was quite a change for me. Today I'll be saying goodbye to 16 kindergarten students and sending them off to first grade. They've come such a long way this year and we've become a "school family." It warms my heart to hear them talk about how we are a family and families treat each other kindly and take care of each other. That might just be even more important than the reading, writing, and math I've taught them this year! With all of that weighing on my mind, I knew I had to create a teacher themed card to share today and Verve's Teachers Count set was perfect for what I had in mind.

I started out by cutting a large circle from a piece of apple green letter patterned paper. The circle was adhered to a kraft panel and trimmed, then topped with narrow strips of green cardstock and yellow ruler patterned washi tape. I stamped one of the sentiments from the Teachers Count set in white pigment ink on a gray circle, then heat embossed it so it would really stand out. I added it to the card, overlapping the patterned paper circle.
Instead of using one more circle element, I stamped and die cut two apples with the help of my MISTI. They were added to the card using foam tape. The finished panel was layered on a red card base.
Hop on over to the Mojo Monday blog for more inspiration from the design team and to add your own take on this week's sketch!
Materials Used:
Teachers Count stamp set, Apples dies (Verve Stamps); Memento Tuxedo Black and Memento Luxe Lady Bug, Pear Tart, and Wedding Dress inks, Memento Rich Cocoa marker (IMAGINE Crafts/Tsukineko); Green Galore cardstock (Stampin' Up!); Smokey Shadow cardstock (Papertrey Ink); Kraft cardstock (WPlus9); circle die (Spellbinders); stitched circle die (Lil' Inker Designs); Recollections Snow embossing powder, yellow ruler washi tape (Michaels); foam tape
Waltzingmouse Stamps June Pajama Party
I couldn't resist inking my my new Waltzingmouse Stamps to play along in this month's WMS Pajama Party. This card uses the We Go Together stamp set and coordinating dies as well as the color scheme from this month's coffee color challenge.
I stamped the coffee cup and donut images on white cardstock and colored them with Copic markers, then used the matching dies to cut out the images. The donut's "icing" was made with something new to me--Radiant Neon Amplify! I applied a thin layer to the image, then heated it with my heat tool to puff it up. Fun!
The images were adhered to a gingham panel using foam tape. I edged the bottom of the panel with a narrow strip of dark brown paper, then added a piece of paper doily to the top before adhering the panel to kraft cardstock. I stamped the "doughnut know what I'd do without you" sentiment beneath the patterned paper strip in brown pigment ink. The finished panel was adhered to a dark brown card base.
Materials Used:
We Go Together stamp set,We Go Together dies (Waltzingmouse Stamps); Memento Tuxedo Black and Memento Luxe Rich Cocoa inks, White Radiant Neon Amplify! (IMAGINE Crafts/Tsukineko); markers (Copic); Chocolate Chip cardstock (Stampin' Up!); Kraft cardstock (WPlus9); 100 Days of Summer-Simple Pleasures (Simple Stories); stitched heart die (Lil' Inker Designs); brown enamel dots (Eyelet Outlet); white paper doily; foam tape
Sunday, June 14, 2015
Paper Smooches SPARKS-I Dig You
*** Scroll down to the post below or click HERE to see my card for this week's Sweet Sunday Sketch Challenge! ***
This week's Paper Smooches SPARKS challenge is a Picture Perfect challenge based on the picture seen above. I was inspired by the house in the photo and the pretty blue accent color, too.
I used the Dog Icons dies to make a dog house for my focal image. Every dog house needs a dog, so I made mine with the Paws for a Cause stamp set and matching Paws Cause Icons dies. The dog house and dog were arranged on a blue card base on top of a strip of "grass" cut with one of the Backdrop Builders dies. To fill out the scene, I added a pair of curly clouds cut from shimmery white cardstock . I stamped the "I dig you" sentiment from the Woofers and Tweeters set to finish the card. I may go back and add some tiny die cut hearts to the card above the dog . . .
Don’t miss what the rest of the SPARKS team has created this week based on the photo. Here’s where to find them:
Lori Tecler--you're here!
Materials Used:
Paws for a Cause and Woofers and Tweeters stamp sets, Paws Cause Icons, Dog Icons, Backdrop Builders, and Curly Clouds dies (Paper Smooches); Memento Luxe Rich Cocoa ink (IMAGINE Crafts/Tsukineko); Real Red, Cool Caribbean, and Shimmery White cardstock (Stampin' Up!); Kraft cardstock (WPlus9); Simply Chartreuse and Smokey Shadow cardstock (Papertrey Ink); foam tape
Sweet Sunday Sketch Challenge 273-Awesome
It's time for another Sweet Sunday Sketch Challenge! I got some new stamps from Avery Elle last week and couldn't wait to ink up the Geek Love set for this sketch. If you follow me on Instagram, you might have seen a sneak peek at this cutie a few days ago . . .
I colored the geek guy with Copic markers, then stamped the sentiment beneath him. It doesn't show in the photo, but I added a bit of Glossy Accents on the lenses of his glasses to give them a glass-like look. After matting the colored image on navy cardstock, I adhered it to a red cardstock panel over a roun number patterned paper panel and a strip of kraft cardstock. I accented the image with a single gold star adhered with foam tape.
To play along, just create a card based on the sketch and link it up on the SSSC blog. Be sure to stop by the blog to check out what the SSSC team has created using the sketch. And, don't forget to check in on Wednesday to see one of our favorite cards made with the sketch.
Materials Used:
Geek Love stamp set (Avery Elle); Memento Tuxedo Black ink (IMAGINE Crafts/Tsukineko); markers (Copic); Real Red and Night of Navy cardstock (Stampin' Up!); Kraft cardstock (WPlus9); Paper and Glue 6x6 paper pad (Echo Park); circle die (Spellbinders); foam tape
Saturday, June 13, 2015
Sweet Thanks
I needed a few thank you cards this week, so I used the current sketch from Freshly Made Sketches to put together a sweet thank you design.
The donuts were made with a donut die from Reverse Confetti. I was lazy and stamped the sprinkles on using pink pigment ink instead of gluing on individual tiny die cuts. I arranged the donuts on a white card base with a strip of pink dotted patterned paper along the left edge. I stamped the "sweet thanks" sentiment from Reverse Confetti's Donut You Know set in brown pigment ink on a banner strip, then used foam tape to adhere the finished sentiment strip over the donuts. I added a bit of sparkle with some pink sequins arranged around the donuts and sentiment. And, the card has already made its way to its recipient--a sweet kindergarten student who brought me an owl necklace to mark the end of our kindergarten year together!
Materials Used:
Donut You Know stamp set, Confetti Cuts Tag Me and Donut You Know dies (Reverse Confetti); Memento Luxe Rose Bud and Rich Cocoa inks (IMAGINE Crafts/Tsukineko); Raspberry Fizz cardstock (Papertrey Ink); Kraft cardstock (WPlus9); Pink Pirouette cardstock (Stampin' Up!); pink dotted patterned paper (Michaels); pink sequins (Treehouse Studio); foam tape
You Warm My Heart
Here's my card for this week's My Favorite Things Wednesday Sketch Challenge. I switched out the trio of rounded square elements for hearts on my version of the layout.
I die cut the hearts from red cardstock using MFT's Staggered Heart Border die. They were arranged on a pink panel. To go with the hearts, I used my Silhouette to cut a small to go cup. I wanted to use MFT's cute coffee cup die, but it was too big for my design. Since I was able to resize the cut file to what I needed, I went with that instead. After cutting it and assembling it, I used foam tape to adhere it to the card. To tie it in to the hearts, I added a tiny heart sticker to the sleeve on the cup. I stamped the "you warm my heart" sentiment from the Perk Up set in red pigment ink on a narrow fishtail flag strip. The strip was adhered to the panel over the top two hearts. I layered the finished panel on to a kraft card base.
Materials Used:
Perk Up stamp set, Die-namics Staggered Heart Border and Fishtail Flag Stax dies (My Favorite Things); Memento Luxe Love Letter ink (IMAGINE Crafts/Tsukineko); Pink Pirouette and Real Red cardstock (Stampin' Up!); Kraft cardstock (WPlus9); coffee cup cut file (Silhouette); heart sticker (Momenta); foam tape
Subscribe to:
Comments (Atom)


