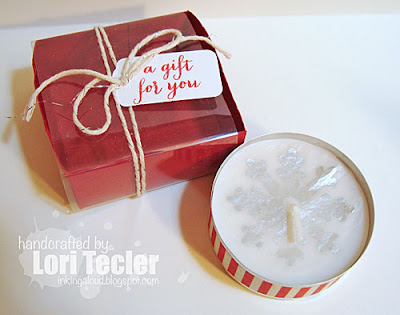
With the holidays approaching, I needed to put together a few small gifts to share. I turned to one of my favorite stand-by's--stamped candles, dressed up and packaged pretty.
 I started out by adding the stamped image to the candle. This was done by stamping the snowflake image from the Clear and Simple Stamps Flurry Days set in silver ink on a white tissue paper circle and punching a hole in the center to thread the wick through, then placing the image on the candle. Once the tissue was in place, I heated it with my heat tool, melting the wax so the tissue adhered to the candle. It doesn't take long, but the tealight's metal rim gets pretty hot, so be careful! I used large tealights--I think they came from Ikea--but I've also done the same thing with the smaller size. After the candle cooled, I wrapped the outside with some festive striped washi tape.
To package the candle, I used a square of red cardstock to make a box. With a few scores and snips, the square was easily turned into a box. The cover is simply an acetate sleeve that I wrapped around the box, scoring it at the sides and securing it with adhesive on the bottom. It slides on and off easily. To decorate it, I wrapped a bit of silver baker's twine around the box and tied on a small die cut tag. I stamped the tag with the "a gift for you" sentiment from the Duly Noted stamp set. I tucked the candle inside and the gift is ready to go!
Materials Used:
Flurry Days and Duly Noted stamp sets, Dare to Be a Diva Red ink, Dare to Be a Diva Red cardstock, Tags 1 die, Simple Adhesive (Clear and Simple Stamps); Delicata Silvery Shimmer ink (Tsukineko/IMAGINE Crafts); circle punch (EK Success); twine (Maya Road); white tissue paper; red and white striped washi tape; acetate


What a fantastic idea Lori and a super sweet gift to give someone in a pinch!
ReplyDeleteVery nice Lori, a great idea! LOVE it!
ReplyDelete