Sunday, October 31, 2010

Two Beautiful Days and a Bat Dog

It was an absolutely gorgeous fall day here! Chloe the cutie puppy and I took a walk in the early morning, then visited the dog park in the afternoon for a long romp with the other neighborhood dogs. Chloe's wiped out, which was part of my grand plan to get her into her Halloween costume. Be sure to make it to the end of this post to see what she's dressed up as for her very first Halloween.

I also squeezed in some stamping time this afternoon. Here's my card for today's SCS featured stamper challenge, based on this pretty floral card. I was inspired by the layout and originally planned for my card to stick more closely to the layout than it ended up in the end.

I used the fabulous big cloud image from Unity's October Kit of the Month for my focal image. I inked the image in Hawaiian Shores ink and stamped it on a white panel. The image wasn't wide enough to look right on a standard A2 card, so I scaled back the card to a 4 1/4" square one. The panel is layered an Aqua Mist mat, then attached to the cardfront with foam tape.

I loved the look of the die cut flower at the edge of the original card, so I did my own version of that here, replacing the flower with a die cut felt sun. A button, tied with some baker's twine, fills in the center of the sun.

Materials Used:
October Kit of the Month (Unity Stamp Co.); Hawaiian Shores ink, Hawaiian Shores and Aqua Mist cardstock, Pretty Pastels patterned paper, Harvest Gold button (Papertrey Ink); Whisper White cardstock (Stampin' Up!); Tuxedo Black ink (Memento); sun die (My Favorite Things); baker's twine (The Twinery); felt; foam tape

While I had the stamps out, I made this simple card for this week's Unity Addicts challenge. The challenge was a recipe based on your initials. My ingredients ended up being black, white, plus one color, buttons, and one layer.

I stamped the clouds in turquoise pigment ink and covered the ink with clear embossing powder, then heat embossed the image. The subtle texture looks great IRL! I used a black marker and a ruler to draw a frame around the outer edge of the cloud image.

The sentiment is stamped in black ink on a small white strip. I added a trio of matching buttons to embellish the strip, filling up the white space. The buttonholes are faux threaded with a line from a white gel pen--one of my favorite cheats! The sentiment panel is attached to the cardfront with foam tape.

Materials Used:
October Kit of the Month (Unity Stamp Co.); Tempting Turquoise Craft ink, Crystal Clear embossing powder (Stampin' Up!); white cardstock (Xerox); Tuxedo Black ink, Tuxedo Black marker (Memento); Simply Blue-tiful buttons (Clear and Simple Stamps); white pen (Ranger)

Now, as promised, here's some Chloe cuteness. After some debate (and purchasing not one, not two, but three different costumes), it was decided that she would be a bat for her first Halloween. We did a trial run earlier in the week and she was not particularly thrilled about playing dress up. I had figured that would be the case since she's been resistant to even wearing a bandanna around her neck. The time at the dog park this afternoon wore her out enough that she really didn't put up too much of a fight tonight when I got her dressed. I did decide that the matching hat with the bat ears wasn't worth the effort. She's such a social puppy that I think she'll love checking out the kids in their costumes. As I'm writing this, we could hear the neighborhood kids outside, yelling "Let's go to Chloe's house!" How cute! I'm off to hand out some candy . . .
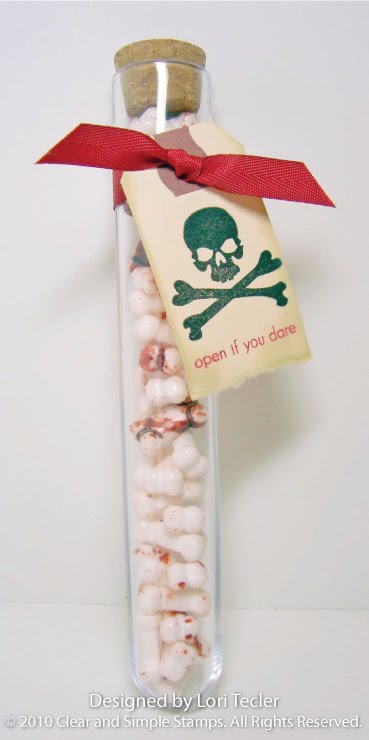
Open If You Dare

Here’s one more Halloween project featuring the Beware set from Clear and Simple Stamps. Today’s the last day to save $1 on the purchase of this great seasonal set with the discount code CSS1010.

This is a very quick and simple project. I used an empty test tube, purchased at the craft store, and filled it with some yucky-looking candy bones (I think they’re really cake decorations). I tied a piece of red twill around the top of the tube and added a stamped manila shipping tag to the twill. I used the set’s large skull and crossbones image along with the “open if you dare” sentiment. The bottom of the tag is torn and inked for a worn, distressed look.

Tomorrow we’ll be revealing November’s Stamp of the Month, so be sure to stop back and check it out. And, you won’t want to miss my post later on today. Continuing with the tradition started with my beloved and much missed Cosmo the crazy dog, I’ll be revealing Chloe the cutie puppy’s very first Halloween costume. We’ve got a few options to choose from and the final decision won’t be made until just before “game time” tonight, but I promise, it will be super cute, just like Chloe herself . . .

Materials Used:
Beware stamp set, Perfect Little Black Dress ink (Clear and Simple Stamps); Real Red Classic ink (Stampin’ Up!); Chai Vintage Touch ink, Pure Poppy twill (Papertrey Ink); manila shipping tag (Staples); test tube (Martha Stewart)

Saturday, October 30, 2010

Flopsey Snowflake--You're It

I made this simple but sweet tag for this week’s My Favorite Things Wednesday Stamp Club’s “Tag, You’re It” challenge. I’ve had this Flopsey for a while now and really wanted to ink him up. He fit perfectly on my manila shipping tag!

The snowy scene is created with some torn white paper layered along the bottom edge of the tag. I stamped the sentiment in blue ink, then added a light dusting of glitter along the top of the torn paper snow.

Flopsey is colored with Copic markers and carefully cut out. I used foam tape to attach him to the snowy scene. I added some blue and white felt snowflakes around him. Each flake has a clear rhinestone at the center for a wintery sparkle. What a sweet tag to attach to a gift for a special friend!

Materials Used:
Flopsey Snowflake stamp set (My Favorite Things); white cardstock (Taylored Expressions); Tuxedo Black ink (Memento); markers (Copic); Whisper White cardstock, Dazzling Diamonds (Stampin’ Up!); Spring Rain ink (Papertrey Ink); felt snowflakes (American Crafts); white grosgrain ribbon (Michaels); baker's twine (The Twinery); self adhesive rhinestones; manila shipping tag (Staples) ; foam tape

Peace Love Joy

It’s time for a new sketch challenge at Paper Craft Planet. Kim’s our hostess this week and she’s shared a simple sketch with lots of possibilities

I used the sketch to make a wintery holiday card using some images from Papertrey Ink. I started by arranging three of the snowflake images from Peace Be Still on my clear block. I stamped them repeatedly along the right half of the light blue card base in silver ink. To keep a clean edge along the middle of the card, I put a piece of scrap paper on the cardfront, leaving only the right side of the cardfront exposed.

I used ribbon strips for the three narrow panels that run down the length of the card. I purposely picked ribbons of varying widths and textures to add interest to the simple design. A small tag, stamped with one of the same snowflake images I used on the right side of the card and a sentiment from the Fillable Frames #8 set, is layered over the ribbons. I added a big rhinestone to the center of the flake and a small bow accent to the top of the tag to dress it up a bit.

If you have a chance to play along, upload your card to the PCP gallery with the keyword sk103010 so that it can be added to the album with the rest of this week’s creations.

Materials Used:
Peace Be Still and Fillable Frames #8 stamp sets, Spring Rain and Enchanted Evening inks, Spring Rain twill, Enchanted Evening grosgrain ribbon (Papertrey Ink); silver ink (Encore); Bashful Blue and Whisper White cardstock (Stampin’ Up!); circle punches (EK Success); silver ribbon (Target); self-adhesive rhinestone (Studio 18)

Friday, October 29, 2010

Blogger Challenge: Week 175/Friends with Flair

This week’s blogger challenge theme is Halloween. I used an older Unity set, The “Boo” Crew, and this week’s Mojo Monday sketch for my card.

I colored the creature image with Copic markers to coordinate with the colors in the designer paper panel I used along the right side of the card. Since the card was small, I purposely picked a paper with words on it so I wouldn’t have to add a sentiment and clutter up my cardfront.

For the other two panels, I used a scrap of orange ribbon with a notched edge and accented with a pair of brads and a scrap of black cardstock that punched with a large spider web border for a decorative look. This layout’s a great one for using up scraps!

For more Halloween themed projects, you can check out what the rest of the challenge players have created. Links to their blogs are in the sidebar on the right. And, for more Unity inspiration, visit the list of Friends with Flair players on the Unity blog.

Materials Used:
The “Boo” Crew kit (Unity Stamp Co.); white cardstock (Taylored Expressions); Tuxedo Black ink (Memento); markers (Copic); Pumpkin Pie and Basic Black cardstock (Stampin’ Up!); Simply Chartreuse cardstock (Papertrey Ink); designer paper (My Mind’s Eye); spider web border punch (Martha Stewart); silver brads (Making Memories); orange grosgrain ribbon (Michaels)

Eat Cake

Here’s my card for this week’s The Cat's Pajamas Tuesday color challenge. I combined the challenge colors—red, orange, and pink—with Mercy’s latest sketch challenge for this bright birthday card.

I started with the Forget about the Cake set. I colored the bunny image with Copic markers. I’m pretty happy with how the coloring turned out here. It’s hard to see in the photo, but I added some sparkle to the candles with an orange Spica pen.

After coloring the image, I played around with different pattern and color arrangements before settling on what you see here. I used two papers from Echo Park’s Sweet Summertime collection on the cardfront. For some texture, I used a red panel that was embossed with some dots. A satin ribbon runs around the card, knotted right near the image panel. I used some pink baker’s twine threaded through the knot to attach the sentiment panel.

Materials Used:
Forget about the Cake stamp set, pink Divine Twine (The Cat’s Pajamas); white cardstock (Taylored Expressions); Tuxedo Black ink (Memento); markers, orange Spica pen (Copic); Hibiscus Burst cardstock, Hibiscus Burst satin ribbon (Papertrey Ink); Real Red and Pumpkin Pie cardstock (Stampin’ Up!); Sweet Summertime collection (Echo Park); Polka Dots embossing folder (Sizzix); circle punches (EK Success)

Thursday, October 28, 2010

Meeting the Moonlight Whispers

I recently got some of the Moonlight Whispers images from Kraftin Kimmie Stamps. Since some of the ones I got are kind of spooky, I wanted to make sure I inked them up before the Halloween season passed.

Here’s Zelda the Zombie using the sketch from this week’s Kraftin Kimmie challenge. I colored her with Copic markers. I wish I was a better colorer--hopefully having images like this to practice on will help me to improve my skills . . .

I chose colors for the image and the card based on this week’s Curtain Call Color Challenge colors, which include daffodil, pumpkin, black, white, and gray. I used two papers from a Recollections Halloween paper pad for the panels on the cardfront. The smaller orange panel is wrapped with a black satin ribbon. Since the image was tall, I ended up adjusting the sketch so that it was a standard A2 sized card instead of a square one. It looked too squished together when I placed everything on a square to try it out.

Materials Used:
Zelda the Zombie stamp (Kraftin Kimmie Stamps); white cardstock (Taylored Expressions); Tuxedo Black ink (Memento); markers (Copic); Basic Gray and Basic Black cardstock (Stampin’ Up!); Recollections Halloween paper pad (Michaels); black satin ribbon (Target)


And, I couldn’t stop with just one. I made a second card using a different Kraftin Kimmie image, this time based on this week’s Sweet Sunday Sketch Challenge.

I used the Pretty Poison image for this card. She was a perfect fit for the sketch’s large panel. I colored the image with Copic markers to coordinate with the purple striped Halloween paper I used to cover most of the cardfront. For some sparkle, I used a clear Stardust pen at the edge of her dress and for the fizzy bubbles coming from the top of her potion. A green scallop edged strip runs just underneath her feet. I wrapped some purple twine around the scalloped strip and secured it with a matching green button. The set’s “cocktail” sentiment is attached with some foam tape.

Materials Used:
Perfect Poison stamp (Kraftin Kimmie Stamps); white cardstock (Taylored Expressions); Tuxedo Black ink (Memento); markers (Copic); Lavender Moon and Simply Chartreuse cardstock, Simply Chartreuse button (Papertrey Ink); scallop edge punch (Stampin’ Up!); clear Stardust pen (Sakura); twine (The Twinery); foam tape

Football All Star

Here’s my card for this week’s Our Craft Lounge sketch challenge. The sketch was designed for a scrapbook page, but I switched it up to make this masculine card using images from the Football All Star set.

I stamped the football player image on a cream panel with brown ink, then inked the edges of the panel with more of the same ink to match the image's weathered, distressed feel.

I wanted a mostly monochromatic look, so I used a piece of brown grid patterned paper to cover most of the cardfront. A piece of cork paper runs down the left side of the cardfront. I added a strip of striped fabric tape to the cork, too—these tapes are the perfect embellishment for masculine cards. The image is layered over the cork and accented with a kraft photo corner. I stamped the sentiment and a tiny football image on a cream oval and again inked the panel’s edges before attaching it to the cardfront with dimensionals.

Materials Used:
from
i {heart} papers: Our Craft Lounge Football All Star stamp set, Memento Rich Cocoa ink, Jillibean Soup Soup Staples designer paper, Creative Impressions cork paper, e2craft light brown/beige striped fabric tape, Spellbinders oval dies, Zva Creative foam dimensionals

other: Early Espresso, Crumb Cake, and Very Vanilla cardstock, photo corner punch (Stampin’ Up!)

Wednesday, October 27, 2010

Witching You a Happy Halloween

Even though it’s coming up this weekend, it sure hasn’t felt like Halloween’s near around here with our temperatures in the mid 70’s! I made this sweet card to celebrate the season using today’s SCS sketch challenge.

The little bunny witch from the Chicken Girl Design Happy Halloween stamp set takes center stage here. The bunny is colored with Copic markers and I added a little Polar White Flower Soft to make her tail super fluffy.

I layered her on a cardfront that’s covered with a panel from Cosmo Cricket’s Matilda paper pad.
I used coordinating colors of solid cardstock, embossed with dotted patterns and matted on black, for the two panels across the cardfront. The colored image is layered onto the card with foam tape.

Materials Used:
from i {heart} papers: Chicken Girl Design Happy Halloween stamp set, Couture Cardstock white Copic blending cardstock, Memento Tuxedo Black ink, Copic markers (BV0000, BV00, BV02, C-1, C-3, C-5, C31, E34, E35, Y35, R30), Flower Soft Polar White, Spellbinders oval dies, Cosmo Cricket Matilda mini deck, QuicKutz embossing folders

other: Basic Black, So Saffron, and Perfect Plum cardstock (Stampin' Up!); silver gel pen; foam tape

Trick or Treat Ghoulie

Starving Artistamps is sponsoring this week’s challenge at 2 Sketches 4 You. I played along using an image from one of the latest releases, the DoodleFactory Ghoulies stamp set.

I colored my Ghoulie girl, Cort, with Copic markers and cut her out. I created a spooky scene for her on the sketch’s large panel. The base is a piece of pale lavender cardstock that kind of looks like an eerie nighttime sky. I added felt clouds and an embossed crescent moon at the top and some torn paper at the bottom for the ground. The colored image is attached to the image with foam tape. I stamped the “trick or treat” sentiment at the bottom of the panel in black ink.

For a spooky accent, I used a spider web strip, punched with a big Martha Stewart border punch, along the left edge of the scene. A piece of lavender seam binding tape is tied around the cardfront for a feminine finishing touch.

Materials Used:
DoodleFactory Ghoulies and Trick or Treat stamp sets (Starving Artistamps); white cardstock (Taylored Expressions); Tuxedo Black ink (Memento); markers (Copic); Perfect Plum, So Saffron, and Basic Gray cardstock (Stampin’ Up!); Lavender Moon cardstock, cloud die (Papertrey Ink); lavender seam binding tape, Spider Web punch (Martha Stewart); Polka Dots embossing folder (Sizzix); white felt; foam tape

Tuesday, October 26, 2010

Simply Stamped Verve

Here are my cards for the last two October Viva la Verve challenges. Both cards are clean and simple designs with minimal stamping and no coloring at all. It seems like most of my cards involve some coloring, so this was a nice change of pace.

This one is based on Jackie’s birthday card as seen here. I made a birthday card, too, using the same basic layout and some of the same design elements, too. I replaced the flower image with a balloon from Verve’s Birthday Bash set. I stamped the image on the panel so it extended over the top. The balloon is cut out from a scrap of red paper and attached to the panel with a little foam tape. The sentiment’s stamped in matching red ink.

The rest of the card is very simple. I embossed a kraft panel with a dotted pattern and created my own dotted patterned paper using the dot strip from the Bountiful Backgrounds set stamped in white ink on a red strip. Both dotted panels are layered on white mats to set them off. A matching red ribbon around the red dotted panel adds a festive accent to the design.

Materials Used:
Birthday Bash and Bountiful Background stamp sets (Verve Stamps); Real Red Classic ink, Real Red, Crumb Cake, and Whisper White cardstock (Stampin’ Up!); Fresh Snow ink (Papertrey Ink); oval die (Spellbinders); Polka Dots embossing folder (QuicKutz); red grosgrain ribbon (Michaels); foam tape


The card for the last challenge took me a while to figure out, even though it ended up being a very simple card. I was inspired by the fall colors I’ve been seeing as I walk Chloe the cutie puppy. Acorns are a big thing, too—Chloe chases them down and chews on them while we walk around the neighborhood. It's her first experience with fall and she's so excited about everything that's around her. I incorporated those elements in my design.

I rotated the sketch, then flipped it back, and tried a bunch of different paper and color combinations before settling on this. I used the sentiment from Tall Oaks for the focal image and added a layered embellishment as an accent—this acorn from a K & Company package of fall embellishments was a perfect match for the sentiment. I used a patterned paper with oak leaves and acorns along the bottom of the card and picked coordinating solids for the panels and mats. A pretty rust ribbon was the only other embellishment I used to keep the attention on the sentiment panel.

Materials Used:
Tall Oaks stamp set (Verve Stamps); Rich Cocoa ink (Memento); Terracotta Tile cardstock, Autumn Abundance patterned paper, Terracotta Tile satin ribbon (Papertrey Ink); Creamy Caramel, Chocolate Chip, and Very Vanilla cardstock (Stampin’ Up!); Autumn Days layered embellishment (K & Company)

Look on the Bright Side

Here’s my card for this week’s Hip Hop sketch challenge. I went for a vintage-y look, which is out of my comfort zone. I managed to incorporate some vintage elements while still keeping my design pretty clean and simple.

I started with the On the Bright Side Itty Bitty. The lamp was inked with markers, then stamped on a cream panel. I added some Liquid Pearls to the bottom of the lampshade and inked around the edges of the panel with a soft brown ink for a more aged look before layering the image on a kraft mat.

I used two patterns from Pink Paislee’s 365 Degrees paper pad for the panels on my cardfront. Again, I inked the edges with a little soft brown ink. The sentiment is stamped in the upper left corner in black ink. It looks a little lost—probably should have stamped it on a solid panel and attached that to the patterned piece . . . After layering the papers, I ran a strip of organza trim with roses across the cardfront. I used i {stick} papers redline tape to attach it quickly and without a gluey mess seeping through the delicate trim. The stamped image is layered over the bulky trim using foam dots. Not completely vintage, but my version of it at least.

Materials Used
from i {heart} papers: Unity Stamp Co. On the Bright Side Itty Bitty, Memento Tuxedo Black ink, Pink Paislee 365 Degrees designer paper pad, Ranger White Opal Liquid Pearls, Spellbinders oval dies, Maya Road organza rose cream trim, i {stick} papers redline tape, Zva Creative adhesive dimensional dots (2 mm)

other: Old Olive, Crumb Cake, and Very Vanilla cardstock, Old Olive and Chocolate Chip markers (Stampin’ Up); Tuxedo Black marker (Memento); Chai vintage touch ink (Papertrey Ink)

Monday, October 25, 2010

Papertrey Ink October Blog Hop


I was so excited to see that this month's Blog Hop theme is winter holidays and occasions other than Christmas. My family and many of my friends celebrate Hanukkah, so I'm always looking for creative ideas for Hanukkah cards and gifts. I can't wait so see what everyone has created!

Here's what I came up with. I made a card and gift box using image from the Mazel Tov set. I used some of the new Blueberry Sky cardstock--what a gorgeous shade of blue!

The card features the dreidel as the focal image. The dreidel is stamped on a scrap of kraft cardstock and cut out. I set it onto the cardfront so that it tilts from side to side, kind of mimicking how a dreidel spins, then falls over. The tilt mechanism is similar to that of a spinner card, but in this card the track is smaller to keep the image in place while still allowing it to rotate. The layout's pretty simple to let the dreidel take center stage. I couldn't resist adding a little sparkle with the sentiment and a silver scallop edged strip.

The box is pretty simple, too. I stamped the menorah image in silver ink on a Blueberry Sky panel and added the sentiment beneath it in Enchanted Evening ink. The candle flames are colored with a gold Spica pen. The front and side panels are covered with Enchanted Evening Bitty Dot Basics patterned paper. I used a pair of layered buttons to hide the velcro dot closure. The box is the perfect size to hold a wooden dreidel and some Hanukkah gelt (gold-wrapped chocolate coins). I may have to make a few more of these before the holidays arrive to give out to some little friends . . .

Materials Used:
Mazel Tov stamp set, Enchanted Evening ink, Enchanted Evening, Blueberry Sky, Kraft, and metallic silver cardstock, Enchanted Evening Bitty Dot Basics 2009 paper, medium scallop edge die, Blueberry Sky grosgrain ribbon, Blueberry Sky and Enchanted Evening buttons, twine (Papertrey Ink); gold Spica pen (Copic); silver ink (Encore); silver cord (Stampin' Up!); Deco Scallop border punch (EK Success); velcro dot; foam tape

Super Star Skates

Here’s my card for this week’s SCS clean and simple challenge. This week’s challenge was to use either gingham or checks. I went with some fun checked fabric tape on my project. This self-adhesive stuff is a great, easy to use accent for projects. My favorite place to get fabric tape is i {heart} papers—Kate’s got a great assortment of colors and patterns available in the store.

I used the skates from Papertrey Ink’s new On Ice set for my card. I'm a huge hockey fan (go Caps and UW Badgers!), so as soon as I saw the skate images, I envisioned hockey skates instead of figure skates and that’s exactly what I did here. I die cut the skates, then stamped the skate image. After stamping, I cut off the “sock” portion of the image above each skate and colored the boots with Copic markers. I used a silver gel pen to color the blades for a super shiny look.

I arranged the skate pair on one end of a red panel, leaving room to run a strip of red, white, and blue checked fabric tape along the left side of the panel. This tape is becoming one of my favorite go-to embellishments for masculine cards. A big blue button, tied with some twine, is set at the bottom of the panel, over the tape, as a simple embellishment. The “super star” sentiment from All Star Team Additions is stamped underneath the image panel in white ink to complete the clean and simple design.

Materials Used:
On Ice and All Star Team Additions stamp sets, Fresh Snow ink, Enchanted Evening cardstock, Enchanted Evening button, ice skate die (Papertrey Ink); white cardstock (Taylored Expressions); Tuxedo Black ink (Memento); markers (Copic); Real Red cardstock (Stampin’ Up!); fabric tape (e2craft); silver gel pen (Sakura); foam tape; twine

Sunday, October 24, 2010

You Can Count on Me

It's a beautiful Sunday here, so Chloe the cutie puppy and I spent some time playing at the dog park this afternoon. Now that we're back at home, she's wiped out, so I had some uninterrupted stamping time. I made this sweet card for today's SCS featured stamper challenge, based on this card.

I changed the orientation of the layout and a few other details for my card. I used one of the DoodleFactory Take a Seat cuties from Starving Artistamps for my focal image. She's colored with Copic markers and cut out using the out of the box technique to get her feet to extend beyond the image panel. I added some Glossy Accents to her glasses for a glass-like look.

Instead of using an embossed panel across the cardfront, I used a patterned paper that features numbers. To match the pattern, I picked the "you can count on me" sentiment from the Here for You sentiment set. Worked perfectly! I added a pair of silver brads to accent the sentiment, then assembled all the pieces on a white cardbase.

Materials Used:
DoodleFactory People-Take a Seat and Here for You sentiment sets (Starving Artistamps); white cardstock (Taylored Expressions); Tuxedo Black ink (Memento); markers (Copic); Blueberry Sky cardstock (Papertrey Ink); Riding Hood Red cardstock (Stampin' Up!); designer paper (Bo Bunny); rectangle die (Spellbinders); silver brads (Making Memories); Glossy Accents (Ranger)

Simply Bewitching

When I saw this week’s Color Throwdown challenge colors—Dusty Durango, So Saffron, and Perfect Plum—I first thought, “no way.” But, I thought about it a little more and decided to give the challenge a try with the Witchy set from The Cat’s Pajamas.

I colored the little witch and her companion with Copic markers using shades that were similar to the challenge colors. I carefully cut her out so I could set her in a simple scene. I wanted a nighttime scene, so I started with a plum panel with torn gray strips as the base (a sidewalk, maybe?). I embossed a circle with a dotted pattern, then brushed it with shimmery white ink to make a moon for the night sky. It’s attached to the scene with foam tape so that the little witch is looking up at the full moon from below.

I kept the rest of the card simple since I was already having a hard time with these colors. I used a piece of plaid paper from Cosmo Cricket’s Matilda line to cover most of the cardfront. Since the plaid looked busy to me, I added some solid strips of So Saffron and Dusty Durango cardstock at the bottom. I wrapped some baker’s twine around the So Saffron panel to fill in the open space a little, then stamped the “you’re simply bewitching” sentiment along the side of the image panel in black ink. Not my most favorite color combination and it was really a challenge, but I think I got it to work.

Materials Used:
Witchy stamp set (The Cat’s Pajamas); white cardstock (Taylored Expressions); Memento Tuxedo Black ink, Brilliance Moonlight White ink (Tsukineko); markers (Copic); Dusty Durango, So Saffron, Perfect Plum, and Basic Gray cardstock (Stampin’ Up!); Matilda mini deck (Cosmo Cricket); circle punch (EK Success); Polka Dots embossing folder (QuicKutz); baker’s twine (The Twinery); foam tape

Saturday, October 23, 2010

Lil Pumpkin Treat Bag

This week’s My Favorite Things Wednesday Stamp Club challenge was to decorate a gift bag or box. I pulled out my new Pure Innocence Li’l Pumpkin image and a small brown paper bag for this sweet little treat bag.


I covered the bag with a panel of sparkly My Mind’s Eye Halloween paper, then started on my little scene. I colored the Pure Innocence image with Copic markers and cut it out, then set it aside to assemble the background. I used some strips of die cut grass along the bottom of the panel and added a pair of die cut felt clouds for the sky. The image is layered on with foam tape. I stamped the “Li’l Pumpkin” sentiment in black ink on the grass and added a copper brad as an accent.

The scene is matted on an orange panel, then set on the bag. I used a punch to make an opening for a small handle and tied some ribbon through the opening. I think I’ll fill the bag with some candy corn . . .

Materials Used:
Pure Innocence Li’l Pumpkin stamp set, cloud and grass Die-Namics (My Favorite Things); white cardstock (Taylored Expressions); Tuxedo Black ink (Memento); markers (Copic); Bashful Blue and Pumpkin Pie cardstock, word window punch (Stampin’ Up!); Simply Chartreuse cardstock, Orange Zest grosgrain ribbon (Papertrey Ink); designer paper (My Mind’s Eye); copper brad (Making Memories); foam tape; white felt; brown paper bag

Best Witches

Happy Saturday! Chloe the cutie puppy and I are heading out for our long Saturday morning walk through our neighborhood before we play at the dog park for a while, then watch the Wisconsin Badgers football game this afternoon (still can’t believe they beat Ohio State last weekend—yay!!). Before we leave, I thought I’d share my card for this week’s Paper Craft Planet sketch challenge, hosted by my friend Lynn.

I combined the sketch with this week’s There She Goes color challenge to use green, orange, and black. I am having so much fun with the adorable images in TSG’s Hauntingly Delightful set—I couldn’t resist inking it up again for this challenge. I used the witch image and colored her with Copic markers to match the challenge colors. It’s hard to see in the photo, but I used a clear Glaze pen to coat her eyes for a fun shine and also colored the star on her hat with a Spica pen for some sparkle.

The rest of the card is pretty simple. I used a corner rounded panel of Echo Park’s Halloween paper to cover most of the cardfront. A big orange button, tied with some green and white baker’s twine, is at the bottom of the image. I inked up just a portion of one of the set’s sentiments to get the little “best witches” saying to stamp on the orange panel.

If you have a chance to play along, upload your card to the PCP gallery with the keyword sk102310 so that it can be added to the album with the rest of this week’s creations.

Materials Used:
Hauntingly Delightful stamp set (There She Goes); white cardstock (Taylored Expressions); Tuxedo Black ink (Memento); markers, Spica glitter pen (Copic); Pumpkin Pie and Basic Black cardstock, corner rounder (Stampin’ Up!); Happy Halloween designer paper (Echo Park); Orange Zest button (Papertrey Ink); clear Glaze pen (Sakura); baker’s twine (The Twinery)

Friday, October 22, 2010

Blogger Challenge: Week 174/Friends with Flair

This week’s blogger challenge is to reuse or recycle something. I made a pretty holiday card using an old soda can and a sentiment from Unity Stamp Co. The can’s been sitting on my kitchen counter for a few weeks now with this challenge in mind. The dog walker has probably walked by it every day and wondered why I had an empty can still sitting on my counter and when I was going to toss it. Now I can say that there is a method to my madness—or messiness—LOL!

My Unity October Kit of the Month arrived in my mailbox the other day and I knew right away what I was going to do with my waiting soda can (it was Diet Coke with Lime, in case you’re interested . . .). I cut the can apart, flattened it, then ran it through my die cutting machine to make some sparkly snowflake accents. After testing it on a leftover scrap first, I tinted the snowflakes a soft blue with my Copic airbrushing system and a B16 marker—so pretty! I added a crystal at the center of each flake for even more sparkle.

The flakes are arranged on a shimmery white card base, using glue dots to keep them in place. I stamped the sentiment on the cardfront in Marina Mist ink and wrapped a pale blue satin ribbon around the top to complete the card. Quick, easy, and environmentally friendly, too!

For more projects using reused or recycled items, you can check out what the rest of the challenge players have created. Links to their blogs are in the sidebar on the right. And, for more Unity inspiration, visit the list of Friends with Flair players on the Unity blog.

Materials Used:
October Kit of the Month (Unity Stamp Co.); Marina Mist Classic ink, Shimmery White cardstock (Stampin’ Up!); snowflake die (My Favorite Things); light blue satin ribbon (Michaels); self-adhesive rhinestones (Studio 18); marker (Copic-B16); aluminum can

Cuppycake Birthday

Here’s my card for this week’s Bellarific Friday from Stamping Bella. This week’s challenge was a sketch challenge. I made a small square card that I think came out kind of busy. It’s starting to grow on me, though . . .

The large Cuppycake with a Sprinkle on Top
image is stamped on a white panel. The images are colored with Copic markers. The cherry on top of the cupcake is covered with Glossy Accents for a shiny look.

I used a striped paper from K & Company’s Confetti line to cover most of the cardfront. Since the paper had diagonal stripes, I mirrored that in my panel under the cupcake image. I machine stitched triangles of rust and green cardstock to a teal panel, picking shades that were close to ones in the patterned paper. A pair of brown ribbon tabs (yes, they are brown, even though they look black here!) is slipped under the left side of the image. I used foam tape to attach the finished panel to the patterned paper. The “happy birthday” sentiment is stamped directly on the paper. I completed the card with copper brads at each corner. I finally realized I could use my paper piercing guide to help me get the placement of the brads even—that made me feel a little better about the card.

Materials Used:
Cuppycake with a Sprinkle on Top image and sentiment (Stamping Bella); white cardstock (Couture Cardstock); Tuxedo Black ink (Memento); markers (Copic); Hawaiian Shores and Simply Chartreuse cardstock (Papertrey Ink); Dusty Durango cardstock, Chocolate Chip grosgrain ribbon (Stampin’ Up!);Confetti matstack (K & Company); circle dies (Spellbinders); copper brads (Making Memories); brown grosgrain ribbon (Michaels); Glossy Accents (Ranger); foam tape; sewing machine

Thursday, October 21, 2010

Tweet Happy Hello

Here’s my card for this week’s Our Craft Lounge sketch challenge. I used my new Sassafras Lass Count Me In paper pad for color inspiration along with the Tweet Trees set for this bright and cheery card. It made for a pretty non-traditional colored tree card, but I’m happy with how it turned out.

I paper pieced one of the set’s tree images using two different papers from the Count Me In pad. I know I’ve said that Indie Girl is among my favorite paper collections, but the fun colors and patterns in this paper pad just might bump the Indie Girl one down a spot or two on my list. The smaller circles on the tree are popped up with some foam squares. I used Copic markers to add some coordinating grass underneath the tree.

I added another pattern from the paper pack into the mix for the panels on the cardfront. I stretched a piece of pink twill across the cardfront and added a matching bow accent. The set’s sentiment is stamped in pink ink on a circle panel that’s attached to the bow’s knot using some baker’s twine.

Materials Used:
from i {heart} papers: Our Craft Lounge Tweet Trees stamp set, Memento Rich Cocoa ink, Couture Cardstock white Copic blending cardstock, Copic markers (Y21, Y23, Y26, YR0000), Sassafras Lass Count Me In Wee Bundle pad, Alexx Kesh pink herringbone twill, Spellbinders rectangle and circle dies, Jillibean Soup baker’s twine, Zva Creative dimensional foam squares, Bow Easy

other: Pink Passion and So Saffron cardstock (Stampin’ Up!)

IHP Birthday Bash-Day 3

Hello and welcome to Day 3 of the i {heart} papers 2nd Birthday Bash! If you missed the posts from earlier this week please scroll down so you don’t miss a thing. It’s not too late to play along so go back to Tuesday’s post on Kate's blog and start there.

You’ll want to be sure you participate in the scavenger hunt/blog hop to earn your 20% off coupon (and see some really amazing projects from 25 incredible designers!).

Today’s challenge is a gift card holder challenge. Deb is hosting it and has some links for templates and ideas on her blog, as well as a Mr. Linky for you to leave your project on to be entered into the drawing for today. Please be sure to tag your uploads with IHPBB10GC. The deadline to enter is Friday morning, 3AM EST.

Winners for each day will be randomly drawn from the day's challenge entries, and everyone who plays along, either with the challenges and/or the scavenger hunt will be eligible for the grand prize drawing that will close the festivities tomorrow!

Additionally, ALL orders placed during the Bash (Oct 19-21) will receive a free goodie bag of surprise merchandise. The more you spend, the bigger your goodie bag!

Also, there will be random drawings for additional prizes from our PaperCraft Planet group members, our mailing list (sign up on the right side of the homepage) and our fans on Facebook. If you are on all three, then you’ve got triple the chances to win!

Here's my project for today's challenge. I made a simple birthday gift card holder with lots of sparkle. The base is a 4 ¼” x 11” piece of pink cardstock, scored at 4 ½”, 5 ½”, and 6 ½” with my ScorBuddy. I folded the score marks to make a place to hold the gift card (see the second photo below).

The front of the gift card is covered with a panel of SEI’s Jocelyn designer paper. I added a super sparkly self-adhesive birthday cake accent, layered over a pair of circles to set it off a little from the pattern. The “celebrate” sentiment from Unity’s It’s Your Day kit is stamped in black ink on a tab that I added as a closure (it slips underneath one of the patterned paper panels on the inside of the gift card holder). I added a piece of matching magenta glimmer ribbon, tied in a girlie bow, as an accent.

The inside of the gift card features the same patterned paper. I used redline tape to secure the scored sections together so they’d pop up when the card is opened. I cut a notch to hold a gift card using a rectangle die. The card slides right in to the notch and is ready to go!

Materials Used:
from i {heart} papers: SEI Jocelyn designer paper, Petaloo Dazzlers 2 tier cake embellishment, Spellbinders circle and rectangle dies, Couture Cardstock white Copic blending cardstock, Unity Stamp Co. It’s Your Day Kit, Memento Tuxedo Black ink, Creative Impressions magenta glimmer ribbon, ScorBuddy, i {stick} papers redline tape, Bow Easy

other: Melon Mambo cardstock (Stampin’ Up!)

Wednesday, October 20, 2010

It's a Snow Day

After the disaster that was last winter, I hope that there's not a snow day for a long while! The memories of all that snow didn't keep me from adding this adorable winter weather bunny to my stamping collection though. I used the set from The Cat's Pajamas for this week's SCS sketch challenge. I combined the sketch with this week's TCP Tuesday challenge to use pink embellishments.

I started with a piece of kraft patterned paper from a DCWV matstack and built my card around that. The bunny image is colored with Copic markers and I used the out of the box technique to cut out its ears so they extended beyond the oval panel. The ice beneath the bunny's feet is sprinkled with a little glitter for some sparkle.

I squeezed in 3 pink embellishments--a pink felt die cut snowflake, a pink button tied with some pink baker's twine, and a strip of pink grosgrain ribbon. The snow day sentiment just fit on the blue snowflake edged panel to finish the card.

I was totally thrilled to find out yesterday that one of my entries for this month's TCP Think Pink Customer Blog Hop was chosen as the winner! I'm looking forward to playing along with the super talented TCP Cat Pack for November's release.

Materials Used:
Skating Bunny stamp set, pink baker's twine, pink felt (The Cat's Pajamas); white cardstock (Taylored Expressions); Tuxedo Black ink (Memento); markers (Copic); Pink Pirouette, Regal Rose, and Marina Mist cardstock, Dazzling Diamonds (Stampin' Up!); winter matstack (DCWV); oval dies (Spellbinders); pink grosgrain ribbon (Michaels); snowflake die (My Favorite Things); Snowflake border punch (EK Success); button; foam tape

IHP Birthday Bash--Day 2

Welcome to Day 2 of the i {heart} papers 2nd Birthday Bash! If you missed yesterday’s post, be sure to scroll down to participate in the scavenger hunt/blog hop to earn your 20% off coupon (and see some really amazing projects from 25 incredible designers!). The celebration continues today with a sketch challenge. Be sure to post your direct link on the Birthday Bash sketch challenge post on Kate's blog, either as a comment or in Mr. Linky and tag your uploads with IHPBB10S. Deadline to enter is Friday morning 3AM EST.

Tomorrow Deb will be hosting another challenge for you.

Winners for each day will be randomly drawn from the day's challenge entries, and everyone who plays along, either with the challenges and/or the scavenger hunt will be eligible for the grand prize drawing that will close the festivities on Friday.

Additionally, ALL orders placed during the Bash (Oct 19-21) will receive a free goodie bag of surprise merchandise. The more you spend, the bigger your goodie bag!

Also, there will be random drawings for additional prizes from our PaperCraft Planet group members, our mailing list (sign up on the right side of the homepage) and our fans on Facebook. If you are on all three, then you’ve got triple the chances to win!

Here’s my take on the sketch. I kept the card pretty simple--I took a little spill down my front steps earlier this week, resulting in assorted bumps and bruises that are making sitting in one place for a long time a little uncomfortable, so I had to keep it quick. I made a cute Thanksgiving card using images from the Hero Arts So Thankful set. The turkey is colored with Copic markers in warm fall colors. I layered the colored image on a scalloped mat and dotted each scallop with some Gold Pearl Liquid Pearls for a little sparkle.

I used a piece of Jillibean Soup's orange Soup Staples designer paper for the card’s top panel. Kate’s got this great paper (plaid on one side, polka dotted on the other) packaged so you get the full assortment of colors available all in one package—be sure to check it out! I used a solid cardstock at the bottom of the card and added a strip of cork paper across the card, hiding the seam between the two different papers. The cork was an easy way to add a little texture to my card. Stitching around the edges and the “Gobble! Gobble” sentiment completed the design.

Materials Used:
from i {heart} papers: Hero Arts So Thankful stamp set, Memento Tuxedo Black ink, Couture Cardstock white Copic blending cardstock, Copic markers (E08, E31, E33, E34, E35, E37, Y000, Y21, Y23, Y26, YR14, YR16, YR24, W00, W-1), Spellbinders oval and scalloped oval dies, Ranger Gold Pearl Liquid Pearls, Jillibean Soup Soup Staples Collection assortment pack, Creative Impressions cork paper

other: So Saffron, Pumpkin Pie, and Crumb Cake cardstock (Stampin’ Up!); sewing machine

Tuesday, October 19, 2010

IHP Birthday Bash

Welcome to the i {heart} papers 2nd Birthday Bash blog hop and scavenger hunt! You should have arrived here from Loretta’s blog. If you're jumping into the middle (or if you're lost!) be sure to start at Kate's. You don't want to miss a thing!

Today we’re celebrating two great years of IHP and are delighted to have some fabulous guest designers playing along with our talented design team members to bring some birthday paper-crafting inspiration your way! Our design team and guests are revealing their creations for this month's design team challenge--to design the "Perfect Pair"--a birthday card and coordinating gift, tag or other presentation item.

We would love if you would join us in making a Perfect Pair of your own (upload to your blog or an online gallery with the keyword IHPBB10). Be sure to post your link on Kate’s blog so we can see your project and enter your name in our challenge prize drawings.

In addition to today's design team challenge, we've got some fun celebrating in store for tomorrow and Thursday! Don't worry - you won't have to hop every day! Kate will be hosting a sketch challenge tomorrow on her blog, and Deb has another challenge for you on Thursday. Winners for each day will be randomly drawn from each day's entries, and everyone who plays along, either with the challenges and/or the scavenger hunt (more on that below) will be eligible for the grand prize drawing that will close the festivities on Friday.
Submitting your challenge projects is not the only way to win! Tucked into the text of today's blog posts we've provided clues to an easy scavenger hunt (most have to do with our favorite products and tools or hobbies and interests we have) that we invite you to play as you hop. When you find the answer, click the link to visit the store and collect "evidence" that is listed on that particular product’s page and email your complete list, in blog hop order, to Kate when you're finished. You can take your time and stretch the hop over the three days of our Birthday Bash celebration...it's not a race, but like any other sale, the earlier you shop, the better the selection! Deadline to submit your scavenger hunt entry is Friday morning, 3AM EST.

By participating in the scavenger hunt you'll receive an exclusive, one time use 20% off coupon code to use when you shop at i {heart} papers. (This will be emailed to you after the Bash when entries are checked.) You will also be entered for your chance to win the grand prize $50 gift certificate drawing on Friday.

ALL orders placed during the Bash (Oct 19-21) will receive a free goodie bag of surprise merchandise. The more you spend, the bigger your goodie bag!

Also, there will be random drawings for additional prizes from our PaperCraft Planet group members, our mailing list (sign up on the right side of the homepage) and our fans on Facebook. If you are on all three, then you’ve got triple the chances to win!

Here’s a look at my birthday bash ensemble, designed with a little girl in mind. I made a fancy fold card featuring the Chicken Girl Design Lookin’ Purrty digi image and a small matching gift box using the same designer paper that I used on the card. The box is tied up with pretty pink satin ribbon and has an opening in the top, lined with clear acetate that reveals the little treat inside—a homemade hair barrette.

The barrette was quick and easy to make with SEI’s velvet paper, cut with Nestabilities dies and stacked on top of a plain barrette using Glossy Accents to hold it in place. And, I had to add a little bling to the center, too, to finish it off.


Here’s the only little girl I had access to modeling the barrette—my very own Chloe the cutie puppy! She was kind enough to sit still (and not eat the barrette) while I took this photo.

For my project, I used
Stamps: Chicken Girl Design Lookin' Purrty digi image
Papers: Couture Cardstock white Copic blending cardstock, SEI Claire designer paper and Happy Day velvet paper assortment #2
Other: Copic markers (RV00, R81, R83, R85, Y00, Y11, Y15, YR24, C00, C-1, C-3, C-5), Zva Creative pink and clear crystals, Ranger Glossy Accents, Spellbinders circle, big scalloped circle, and oval dies, QuicKutz Polka Dots embossing folder, i {stick} papers redline tape, May Arts pink/light pink reversible satin ribbon

Your next stop on the hop is Lynn. There's a list of all of the participating designers on Kate's blog just in case you get lost along the way!

Monday, October 18, 2010

Spooktacular Sketches

Clear and Simple Stamps is sponsoring this week’s 2 Sketches 4 You challenge. Be sure to stop by 2S4Y to check out the sketch (and the bonus sketch from CSS designer Regina Mangum).

Here’s my card based on this week’s sketch. I am having so much fun with this month’s Stamp of the Month, Beware! Here, I used the set’s spider web image as a backdrop for a big spider button. The web is stamped in silver ink on shimmery white cardstock for a subtle sparkle. I stamped the set’s “spooktacular” sentiment at the bottom of the panel in black ink, then attached the spider button with a glue dot. The panel is accented with a big olive grosgrain bow.

I used some striped patterned paper to cover most of the cardfront. A black border punched spider web strip is at the right side of the cardfront, tucked underneath the patterned paper. A strip of black cardstock and grosgrain ribbon runs down the cardfront. I used my sewing machine to stitch it in place and add a little contrast. The image panel is layered over the strip, set in place with foam tape.

Materials Used:
Beware stamp set, Perfect Little Black Dress ink, Green with Envy cardstock (Clear and Simple Stamps); Basic Black and Shimmery White cardstock (Stampin’ Up!); silver ink (Encore); Recollections Ravenwood Manor designer paper (Michaels); olive grosgrain ribbon (Morex); Spider Web border punch (Martha Stewart); spider button (Blumenthal Lansing); sewing machine; foam tape

This card is based on Regina's bonus sketch. I used the spider web image again here, but this time it serves as a backdrop for some bat buttons. I stamped the web on small squares of shimmery white cardstock, then layered them on black mats before setting them on a strip of CSS’s Creamsicle Cardigan cardstock. Before I attached the bats to the webs, I knotted some twine through the buttonholes for a little contrast.

I used a combination of contrasting colors and patterns for the panels underneath the strip of bats. I made my own patterned paper using the Dots and Lines set and white ink on a piece of purple cardstock. I found some fun patterned paper covered with bats for the large panel. Some green and white baker’s twine is wrapped around the patterned paper to fill the open space a little. The twine is secured with an orange button to bring in a bit more orange. Everything’s arranged on a black card base—the bold mix of Halloween colors really pops nicely against the black background.

Materials Used:
Beware and Dots and Lines stamp sets, Perfect Little Black Dress and A Blanc Check inks, Creamsicle Cardigan cardstock (Clear and Simple Stamps); Elegant Eggplant, Basic Black, and Shimmery White cardstock (Stampin’ Up!); Recollections Halloween designer paper (Michaels); Orange Zest button, twine (Papertrey Ink); green and white baker’s twine (Divine Twine); sewing machine; foam tape

One Layer Pair

This week's SCS clean and simple challenge is a sketch challenge for a one layer card. I really liked the sketch and had a bunch of ideas. I settled on two to share today.

The first one is a fun Halloween card featuring images from the Beware set from Clear and Simple Stamps. I drew a frame on a piece of pale gray cardstock using a marker and a rectangle made from a scrap of cardstock, leaving a space at the bottom for a sentiment. To keep the rectangle in place while I was outlining it, I used some repositionable adhesive.

Once I had the frame drawn, I stamped the large spider web image in the upper left corner of the frame. I used sticky notes to mask outside of the frame, keeping the web image inside. I used the same black marker that I used to draw the frame to draw two little lines extending from the web for spiders to hang from. I attached two small spider buttons at the bottom of the lines. The set's spooky "happy Halloween" sentiment is stamped in orange ink, filling the open space at the bottom of the frame.

Materials Used:
Beware stamp set, Perfect Little Black Dress ink (Clear and Simple Stamps); Pumpkin Pie Classic ink (Stampin' Up!); Soft Stone cardstock (Papertrey Ink); black marker (Memento); clear Stardust pen (Sakura); spider buttons (Blumenthal Lansing)

Here's card number two. I went with a fall theme on this one. I started with a kraft card base and drew in a frame with a dark brown marker. I stamped a pair of leaves from Papertrey Ink's Leaf Prints set inside the frame using rust ink.

I wanted a subtle way to show that the leaves were fluttering down, so I made a wavy line in the kraft paper using a tracing wheel. That was too subtle, so I poked the indentations made from the tracing wheel with my paper piercing tool to define them a little more.

The "give thanks" sentiment from the Fillable Frames #8 set is stamped in brown ink in the frame's open space. I accented the sentiment with a pair of gems on each side. They're colored rust with Copic markers to match the leaves.

Materials Used:
Leaf Prints and Fillable Frames #8 stamp sets, Terracotta Tile ink (Papertrey Ink); Crumb Cake cardstock, Chocolate Chip marker (Stampin' Up!); Rich Cocoa ink (Memento); E08 marker (Copic); clear crystals (Studio 18); tracing wheel

Sunday, October 17, 2010

I Love My Mummy

It was a beautiful day here today, so Chloe the cutie puppy and I took a long walk this morning and later on, spent some time hanging out at the dog park--her favorite place to go. We hit a big milestone today. Chloe actually got herself in the car. Until today, she's refused to jump into the car and I've been hoisting her up. Now that she's 45+ pounds, it's not as easy to do. I've been trying to get her to do it and finally, she hopped in. So happy!

After we got back from the dog park, while Chloe rested I made this card for today's SCS featured stamper challenge. It's based on this card. I loved the dog theme, but I changed it to more seasonal Halloween one using an image from an older DoodleFactory Halloween set from Starving Artistamps.


I stamped the mummy image on a scrap of white cardstock and added a little shading with some warm gray Copic markers, then cut the image out. I stamped the image a second time on a cream panel, then attached the cutout image to the panel, slightly offset from the stamped one to get an in-motion look like the one on the inspiration card. I had some room at the bottom of the panel so I stamped the "I love my mummy" sentiment below the image in orange ink.


The way that the ribbon was threaded through the image panel on the original card caught my eye, so I did the same thing on my card Instead of centering the image panel on the front of my card, I offset it a bit, which allowed a bit more room for the big orange bow. I stamped a heart from the DoodleFactory Sweets N Hearts set, picking one with a big dot pattern to coordinate with the designer paper I used for the cardfront. The heart dangles from the center of the big bow on a baker's twine loop.

Materials Used:
DoodleFactory Halloween (mummy image) and Sweets N Hearts sets, Trick or Treat sentiment set (Starving Artistamps); white cardstock (Taylored Expressions); Tuxedo Black ink (Memento); markers (Copic); Pumpkin Pie Classic ink, Basic Black and Very Vanilla cardstock, horizontal slot punch (Stampin' Up!); designer paper (Making Memories); circle punches (EK Success); Orange Zest grosgrain ribbon (Papertrey Ink); baker's twine (The Twinery); foam tape

Take It Easy

Here’s my card for this week’s The Cat’s Pajamas Tuesday challenge. This week’s challenge was an inspiration challenge featuring a photo of a pink and white striped mug. I took my cue from the colors and stripes to create this fun card using the Enjoy the Ride set.

I started by stamping the bunny on white cardstock and coloring the image with Copic markers. I carefully cut around the image (there are lots of little, thin, tiny sticking-out parts on this image!) and added some sparkly crystals to the big headlight and sideview mirrors, too. The simple setting for the image is made from a piece of patterned paper with torn strips of gray cardstock along the bottom to serve as a road. I attached two die cut felt clouds to the scene before adding the stamped image with foam tape.
To get the striped panels at the bottom of the card, I used different width scraps of two shades of pink cardstock. I ran adhesive across the card, then simply layered on the strips, trimming along the bottom of the cardfront once I had covered the length of the card. Once the strips were in place, I attached the scene to the card and added the sentiment on a ribbon pennant, anchored with a pink ribbon tied with some baker’s twine.

Materials Used:
Enjoy the Ride stamp set, pink Divine Twine (The Cat’s Pajamas); white cardstock (Taylored Expressions); Tuxedo Black ink (Memento); markers (Copic); Pink Pirouette, Pretty in Pink, Regal Rose, Very Vanilla, and Basic Gray cardstock, Regal Rose grosgrain ribbon (Stampin’ Up!); Belmont Circle designer paper (Hampton line-Scenic Route); cloud die, Raspberry Fizz button (Papertrey Ink); self-adhesive rhinestones (Studio 18); felt; foam tape

Saturday, October 16, 2010

Batty for You

Today is Sweetest Day and in honor of this celebration, I have a sweet card made with a spooky stamp set. I turned images and sentiments from the Beware set from Clear and Simple Stamps into something completely different on this clean and simple card.

I started by cutting a large heart from a piece of red felt. The heart is machine stitched (not the greatest stitching, but it works . . .) in place on a white panel, over a piece of black twill. The twill and felt elements add a lot of textu re to this otherwise pretty simple card.


I stamped the set's large bat image on a scrap of white cardstock and carefully cut it out. I added some foam tape to the back of the bat and set it on the card with one of the wings overlapping the heart.


The set's "batty for you" sentiment is stamped in red underneath the bat image. I love when you can find a way to use an "occasion" stamp set for more than just what it's intended for! Beware is this month's Stamp of the Month and through October 31, you can use the code CSS1010 to get $1 off your purchase of the set.

For more CSS inspiration, be sure to stop by the CSS iPhone app. One of my projects is featured on the app today. I have a teeny, tiny sneak peek to share with you. You can get all the details on the app right here. The app was recently upgraded to include some new features that make the app an even better resource for you. It's pretty much my first stop on my iPhone each and every morning!

Materials Used:
Beware stamp set, Perfect Little Black Dress ink, A Blanc Check cardstock (Clear and Simple Stamps); Real Red Classic ink, Real Red and Basic Black cardstock (Stampin' Up!); black twill (Martha Stewart); heart die (Spellbinders); felt; sewing machine; foam tape

 
Blogging tips